Currently IP-Symcon in version 5.x is available for Windows, macOS, Linux (Debian), Raspberry Pi, QNAP and Synology.
In the following we are going to go through the steps of installing the software on a Raspberry Pi 2 with the Debian/Buster release of Raspbian.
Preparation
Start with executing the following command and verify the correct time or set the time zone if needed:
dateIf the time zone needs to be set run the Raspberry Pi configuration tool to do so:
sudo raspi-configInstallation
We start with adding the IP Symcon stable release to the APT package manager:
sudo nano /etc/apt/sources.listInsert the following line at the end:
deb http://apt.symcon.de/ stable rpi

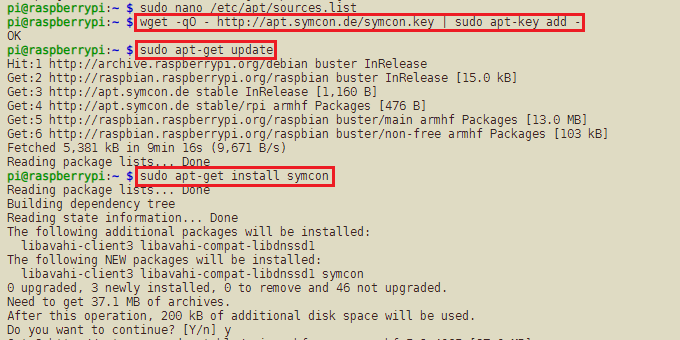
Add GPG-key:
wget -qO - http://apt.symcon.de/symcon.key | sudo apt-key add -Execute the following commands on the shell:
sudo apt-get update
sudo apt-get install symcon

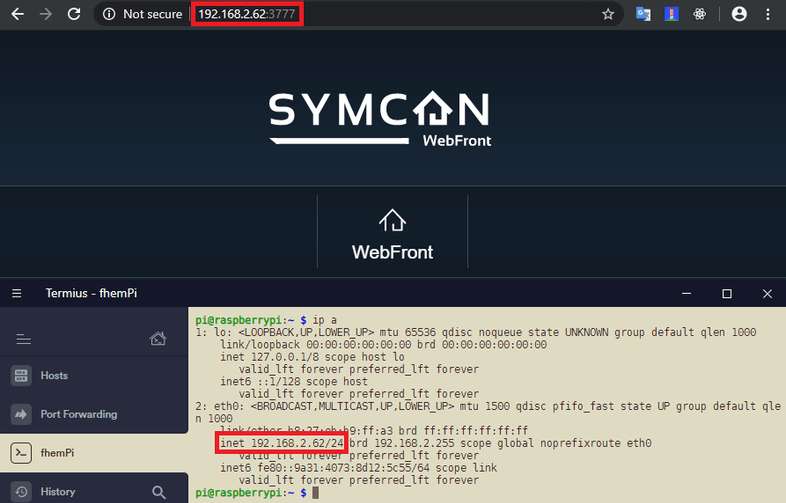
The WebFront should be available under http://ipaddress:3777/. You can find your Raspberry Pi's IP address by using the command ip a. Type in this IP address, followed by :3777, into the address bar of your default browser to access the IP Symcon web frontend.

Update
Update to the most current version
sudo apt-get update
sudo apt-get upgrade
How can I start and stop the IP-Symcon service?
sudo /etc/init.d/symcon start
sudo /etc/init.d/symcon stop
sudo /etc/init.d/symcon restart
Troubleshooting
- How can I check if the service runs correctly?
sudo ps x | grep symcon- How can I view/follow the log file?
tail -f /var/log/symcon/logfile.log
