IN-Motion 300
Passive Infrared Motion Detector
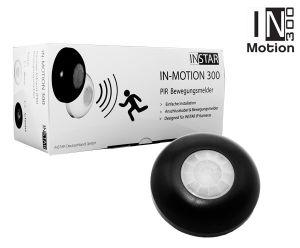
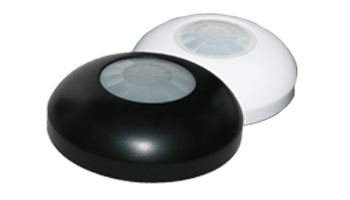
IN-MOTION is a passive (PIR) motion detector. This sensor is the perfect extension for your ip camera in order to minimize false alarms. While the camera is using a software based motion detection which compares each picture (frame) with each other to identify a motion, the PIR detector is only detecting humans or bigger animals which will release heat from the body's. This way a tree which is moving in the wind or light which gets turned on and off will not cause an alarm of your ip camera. The IN-MOTION motion detector will not detect this kind of movment as an alarm which will lower the amount of false alarms enormously.
The scope of the delivery sums up everything you will need to use the sensor with your INSTAR IP camera (as long as the camera model comes with an Alarm I/O - please check the cameras technical specification):

- 1x IN-MOTION 300
- 1x 4m signal cable
- 1x power supply (12V / 3A) with 3m cable
- 1x set of dowels and screws
- 1x installation manual
How does a motion detector work?
What is PIR?
PIR stands for Passive Infrared or Pyroelectric Infrared. PIR sensors can be defined as detectors of warm-bodied targets in motion. A stationary target can not be detected. To detect a moving target, the target must have a surface temperature that is substantially different than the surrounding ambient temperature. Although the usual targets of a PIR detector are warm-bodied (mammals, birds), the PIR sensor will also detect a moving target that has a surface temperature that is significantly lower than the ambient temperature. As long as the target is large enough, and its surface temperature is detectably different than the ambient (higher or lower) - and the target is moving - it can be detected by a PIR sensor.
Main Features of the IN-Motion 300
- Internal logic control to avoid false alarms
- Auto temperature compensation
- Pulse count adjustment
- White light interference compensation
- RF interference comp. (20V/m-1GHz)
- Wide angle Fresnel lense
- Ceiling installation
- Alarm output N.C. / N.O.

General Considerations
Temperatures can often change dramatically in relatively short times. Large temperature changes can render the PIR sensor either more, or less, sensitive. As ambient temperatures rise to near 37ºC, the difference between the target and ambient temperature decreases - and the sensitivity of the sensor declines. As temperatures decrease the opposite is true and the sensor becomes more sensitive.
As target and ambient temperatures become equal, the PIR sensor may no longer be able to detect a target. Large targets usually have enough variation in their surface temperature to allow the sensor to detect them - even when the ambient temperature is the same as their average body temperature.
The IN-Motion PIR sensors compensate the PIR detector sensitivity according to the ambient temperature. This allows you to utilize the full range of the sensors capabilities - whenever and wherever they are needed!
How do I install the IN-Motion 300?

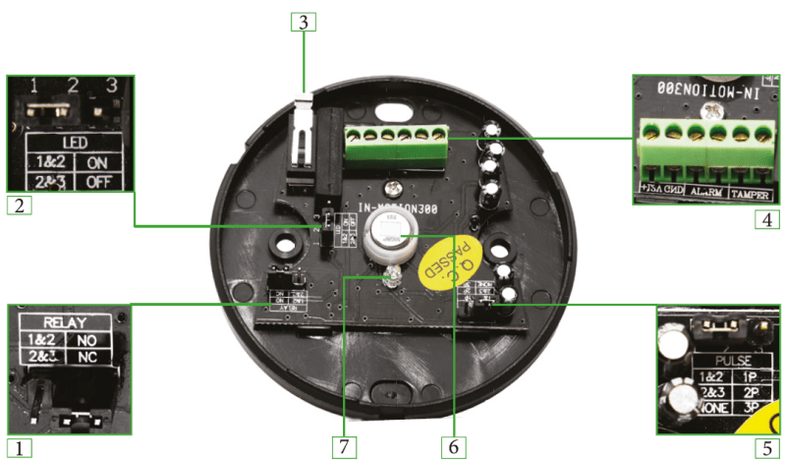
| Component | Function | |
|---|---|---|
| 1 | Relay Jumper | Allows you to set the relay to “Normally Open” (1&2) or “Normally Closed” (2&3). In NC mode an interruption in the connection to the sensor, e.g. when it is damaged, will lead to an alarm. NC is the standard mode. |
| 2 | Alarm Indicator Jumper | Set the Jumper to the pins 2&3 to deactivate the red alarm indicator LED (see 7, below). |
| 3 | Tamper Switch | Reserved holes for screw mounting (Recommended to use bracket mouting). |
| 4 | Connection Terminal | Connector for the 12V power supply + alarm output. |
| 5 | Pulse Compensation Jumper | In case your sensor triggers too many false alarms, please adjust the sensors sensitivity - Jumper on Pin 1&2 equals a high sensitivity, 2&3 an average sensitivity and removing the jumper leads to a low sensitivity. |
| 6 | IR Sensor | Dual element pyroelectric detector. |
| 7 | Alarm Indicator | The red shows LED the alarm state of the sensor. |
How do I connect it to my IP Camera ?

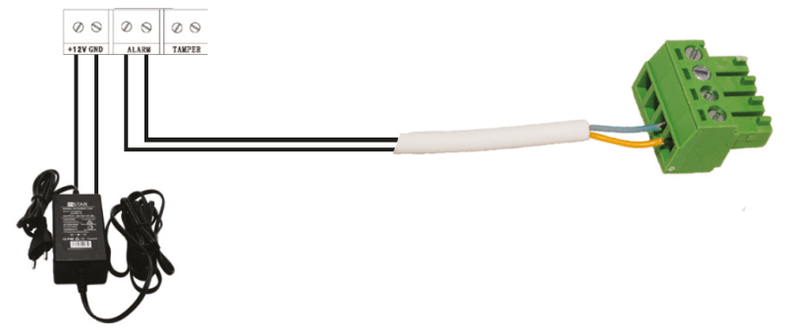
The IN-Motion PIR Sensor is already connected to the power plug and the alarm output cable. Simply connect the signal cable to your INSTAR cameras alarm input connector. The image below shows the I/O bridge of IN-3005/3010 or 3011 - choose the ports 3 & 4 for the sensor cable and replug the bridge into the cameras I/O connector.
 These are the components of the IN-Motion 300 PIR motion detector.
The alarm input of your camera might look different depending on your camera model. Please refer to your user manual to identify the correct ports. You may choose either polarity when connecting the cable. After connecting the PIR sensor with your camera's signal input, please open the camera's web user interface. Go to the alarm settings and activate the external alarm input. Depending on how you set up your sensor (N.C. or N.O.) choose the Relay Position (HD cameras) / Trigger Level (VGA cameras) accordingly. In practical terms that means - choose the value that doesn't cause you a continuous alarm trigger even if nothing is happening in front of the sensor. You can use the IN-Motions alarm LED (red alarm indicator should light up when triggered, see table above #7) to test if the sensor is working. Testing it in it´s place of installation will allow you to adjust it to a suitable sensitivity.
Triggering the PIR sensor should now trigger an alarm event inside of the camera. The trigger event will be treated just like an internal motion detection event by the camera. So all the settings in place for an alarm event (video recording, email notification, ftp upload, etc) can be triggered by the PIR sensor from now on.
Technical Specifications
| Sensor Model | INSTAR IN-Motion 300 PIR Motion Detector |
|---|---|
| Operating Voltage | D.C. 9V - 16V |
| Current Consumption | 18mA @ DC12V |
| Detection Distance | Diameter - 8m (at a height of 3.6m) |
| Detection Angle | 360 ° @ an opening angle of ~ 90° |
| Start-up Time | 60 seconds (warm-up time up to 10 minutes in temperatures below -10°C !) |
| RF Interference Compensation | 10MHz 1GHz 20V/m |
| Alarm Indicator | Red LED |
| Alarm Output | N.C. or N.O., DC 28V/100mA |
| Tamper Output | N.C., DC 28V / 100mA |
| Sensor | Dual element pyroelectric sensor |
| Environment Humidity | 95% RH (no congelation) |
| Working Temperature | -10°C to +50°C |
| Installation Mode | Ceiling- or Wallmount |
| Installation Height | 2.5m to 6m |
| Size | 79 mm diameter / 23mm depth |
| Compatible with | IN-2905 V2, IN-2907, IN-2908, IN-3001, IN-3005, IN-3010, IN-3010 PoE, IN-3011, IN-4009, IN-4010, IN-4011, IN-5907HD, IN-5907HD PoE, IN-6011HD, IN-6012HD, IN-6012HD PoE, IN-7011HD, IN-7011HD PoE |
