Wall Installation
Step 1:
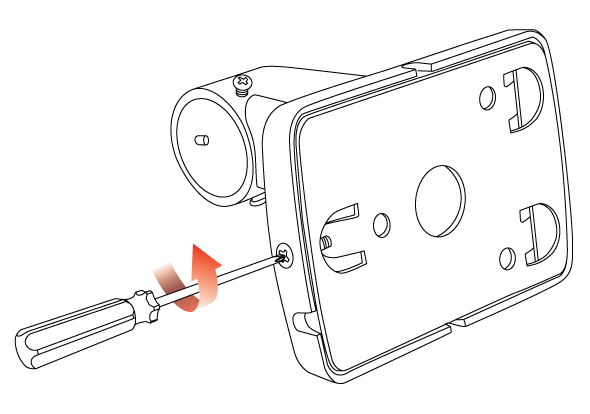
Please loosen the bottom screw of the wall mount bracket as shown above in Fig.1.
Step 2:
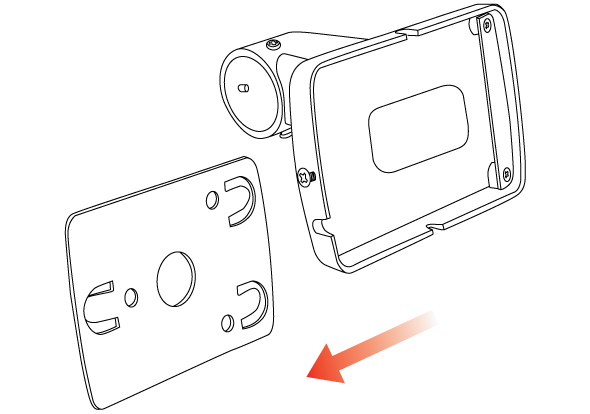
Slide the metal plate towards the bottom of the wall mount bracket and take out the metal plate.
Step 3:
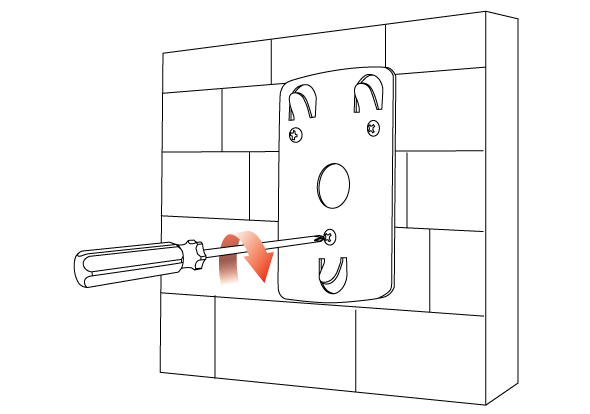
Use the included screws and dowels and mount the metal plate on the wall.
Step 4:
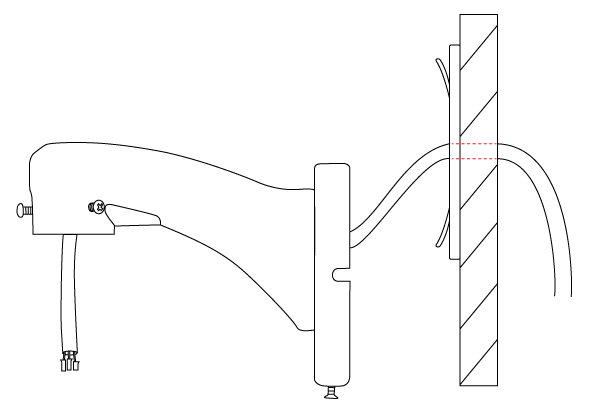
Put the extension cable through the wall, and then cross through the wall-mount bracket as shown in the Fig.4.
Step 5:
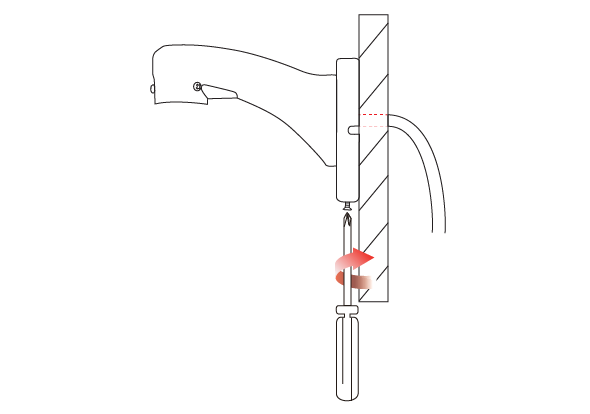
Attach the wall-mount to the metal plate on the wall. Once attached, please tighten the screw at the bottom of the wall-mount.
Step 6:
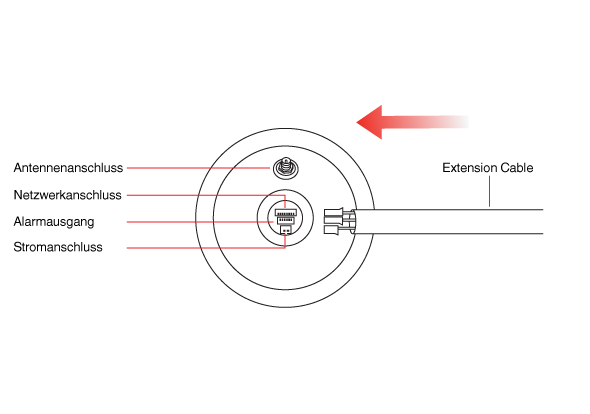
Connect the connection cable with the camera according to the drawing shown in Fig.6.
Step 7:
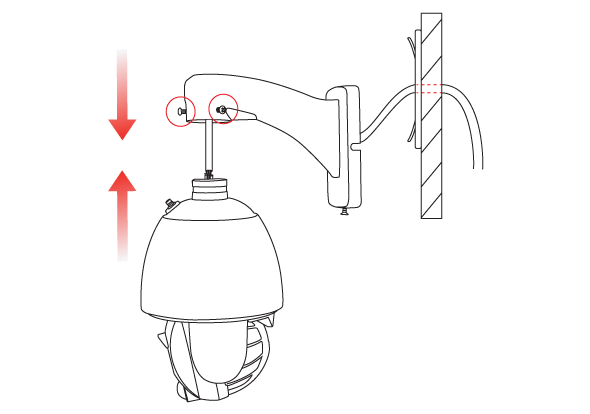
Attach the camera unit to the wall-mount. To do so, please loosen the 3 screws at the wall mount and then attach the camera and tighten the screws again.
Ceiling Installation
Step 1:
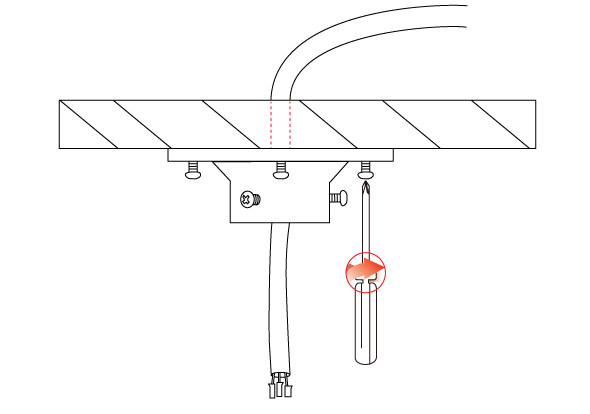
Drill the holes according to the drilling template. Put the cable through the ceiling. Use the delivered screws and dowels to mount the bracket onto the ceiling.
Step 2:

Connect the connection cable to the camera according to Fig.2.
Step 3:
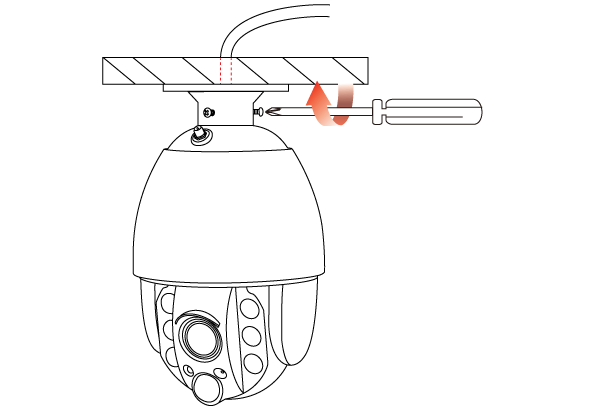
Loosen the screws on the neck of the bracket, put the camera in position and fix it on to the bracket by tightening the screws again.
