Installation
- Download the binding already built in JAR format from here (currently this is the version
ipcamera-2020-02-01.zip):

- Place the JAR file after you unzip it into your openhab2-addons folder
/usr/share/openhab2/addons. You don’t need to install the binding from PaperUI - once the JAR file is in the correct folder the binding should be available to use (make sure that you download the latest version and notipcamera-2020-02-01.zipused in the commands below):
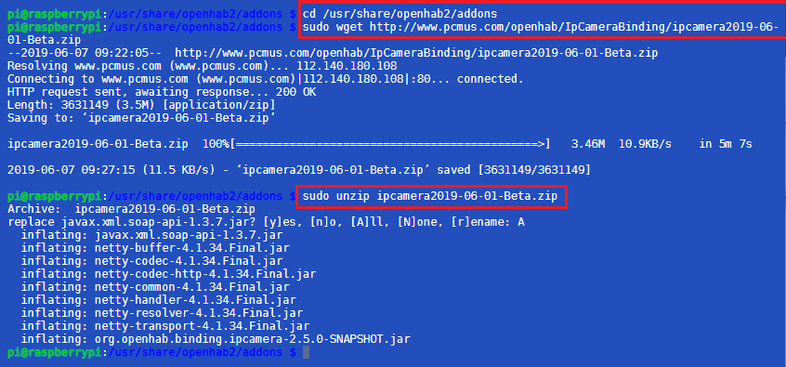
cd /usr/share/openhab2/addons
sudo wget http://www.pcmus.com/openhab/IpCameraBinding/ipcamera-2020-02-01.zip
sudo unzip ipcamera-2020-02-01.zip
sudo reboot
- Install FFMPEG
sudo apt update
sudo apt install ffmpeg

Configuration
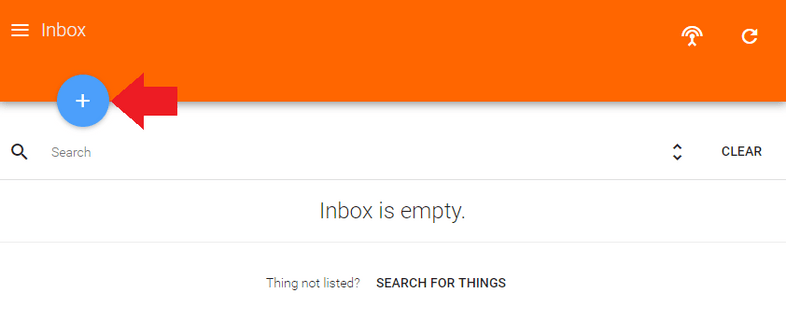
- Open the OpenHAB Paper UI and navigate to your Inbox and click on the Plus button:
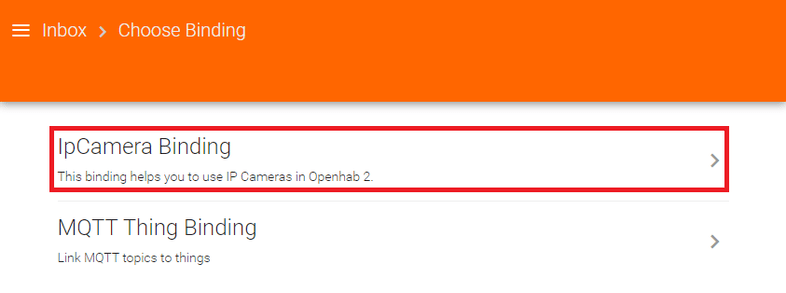
- Select the IPCameraBinding:
- Wait for the discovery and select your camera:
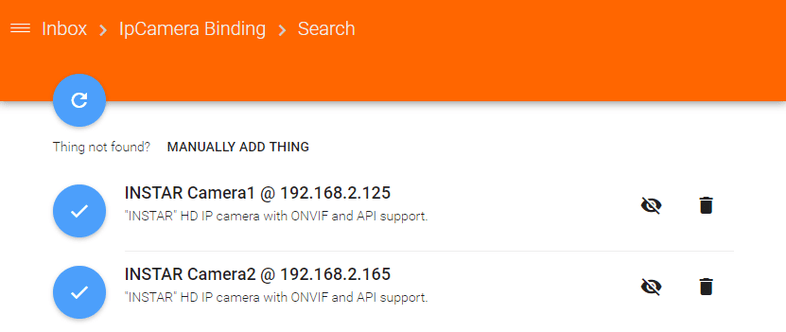
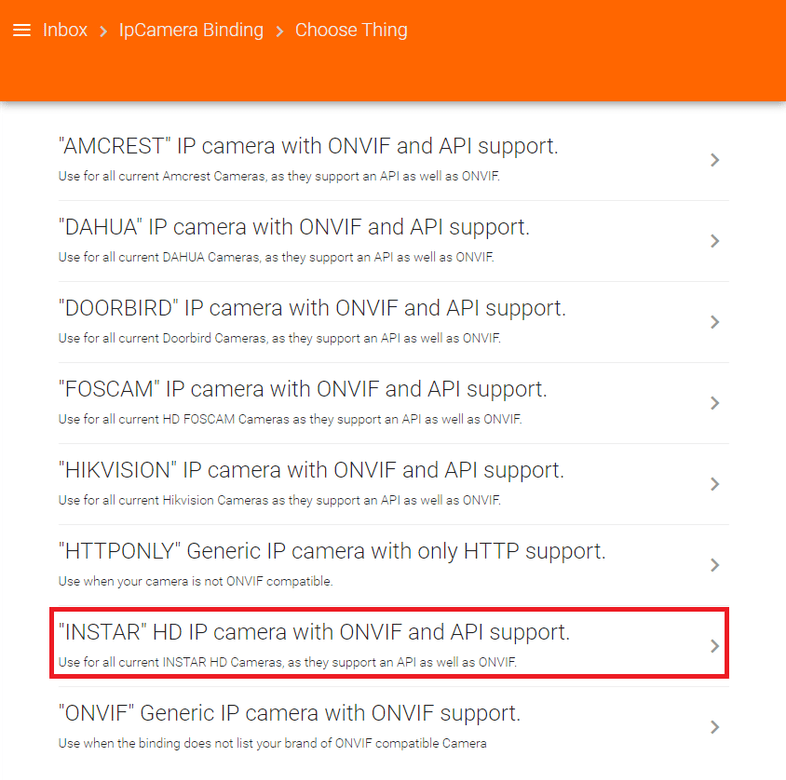
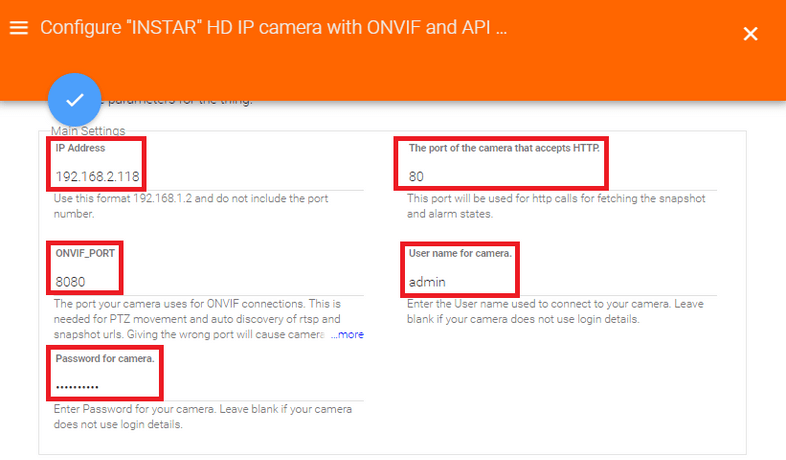
If the discovery cannot find your camera, click in Add Manually aand select INSTAR HD IP camera with ONVIF and API support
- To use the new streaming features, you need to:
- Set a valid SERVER_PORT as the default value of -1 will turn the features off.
- Add any IPs that need access to the IP_WHITELIST surrounding each one in brackets (see below example). Internal IPs will trigger a warning in the logs if they are not in the whitelist, however external IPs or localhost will not trigger a warning in the logs as they are completely ignored and the binding will refuse to connect to them. This is a security feature.
- Ensure ffmpeg is installed.
- For cameras that do not auto detect the H264 stream which is done for ONVIF cameras, you will need to use the FFMPEGINPUT and provide a http or rtsp link. This is used for both the HLS and animated GIF features. For most brands the ONVIFMEDIA_PROFILE needs to match the stream number you have setup for h264. This is usually 0 and is the main-stream, the higher numbers are the sub-streams if your camera has any. The DEBUG log output will help guide you with this in the openhab.log if ONVIF is setup correctly.
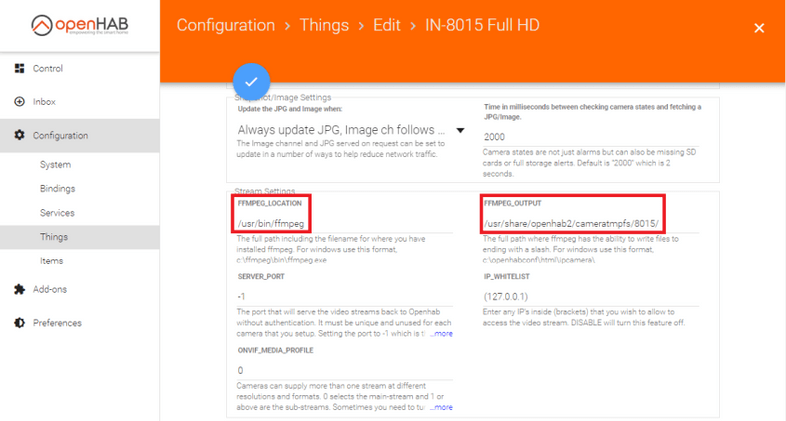
The default ffmpeg directory is /usr/bin/ffmpeg you can verify this with the which ffmpeg command on your linux bash. For the output directory you can choose a path - in the example I added a folder /usr/share/openhab2/cameratmpfs/8015 inside the OpenHAB 2 install directory. Make sure to set the owner for this directory - recursively - to openhab: sudo chown -R openhab:openhab /usr/share/openhab2/cameratmpfs to allow OpenHAB to use it.
- Now go to Configuration/Things and select the camera you just created:
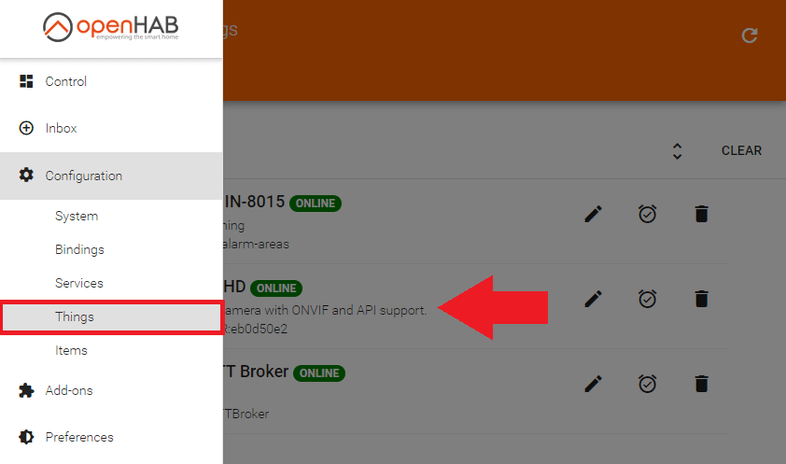
- Click on each Channel that you want to link to an Item on the Paper UI - I choose the Snapshot from Camera:
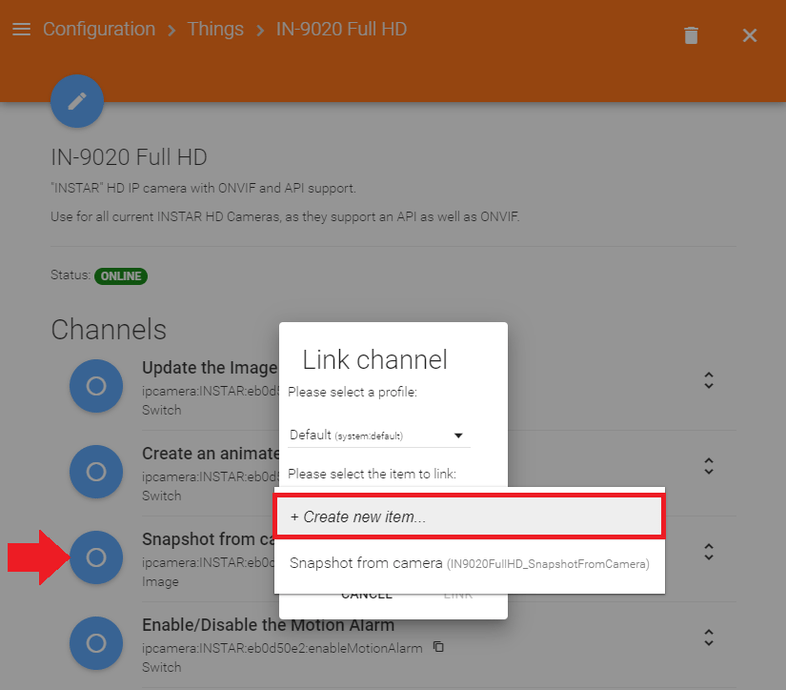
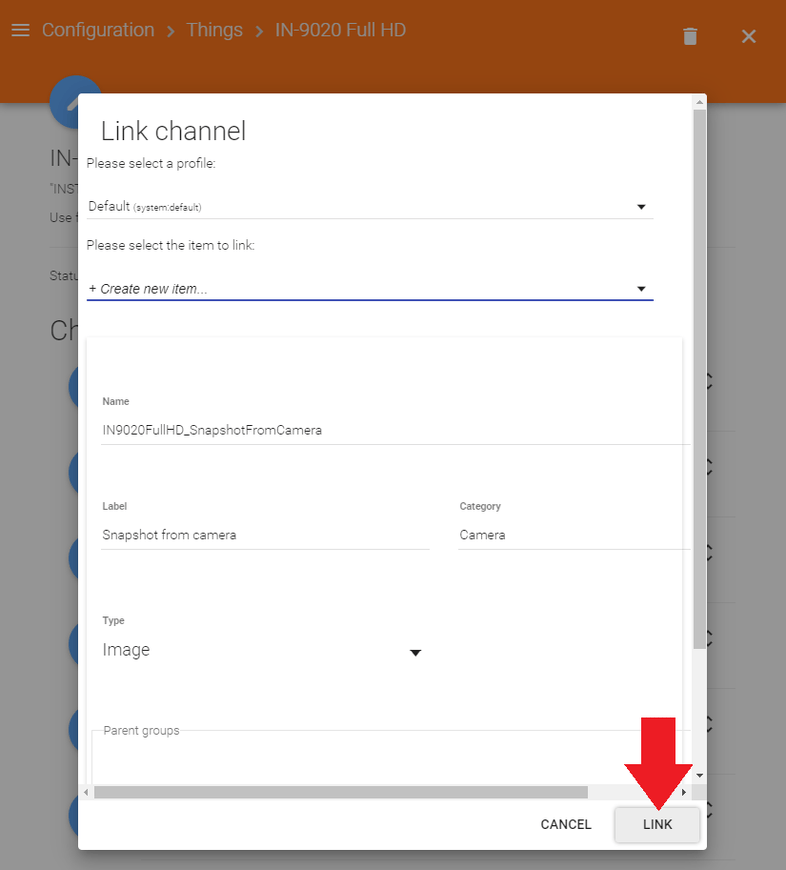
- We can leave everything by it's default value for now and click on Link:
- Back on the Control Panel you can now see your cameras life video (JPG Stream):
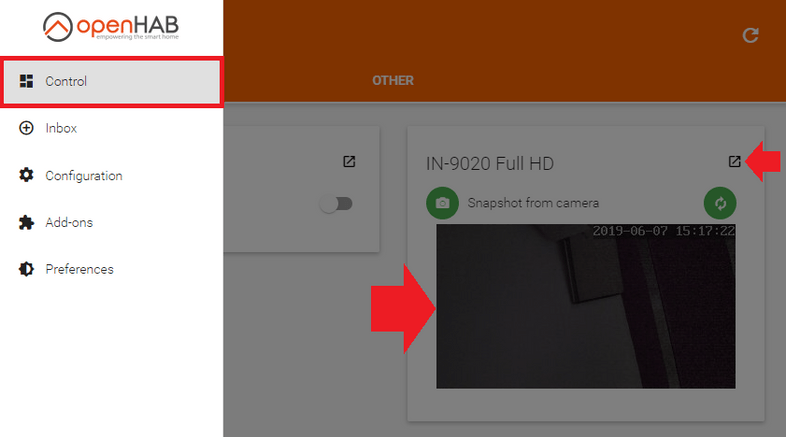
- Go back to the Things page and link as many Channels as you need:
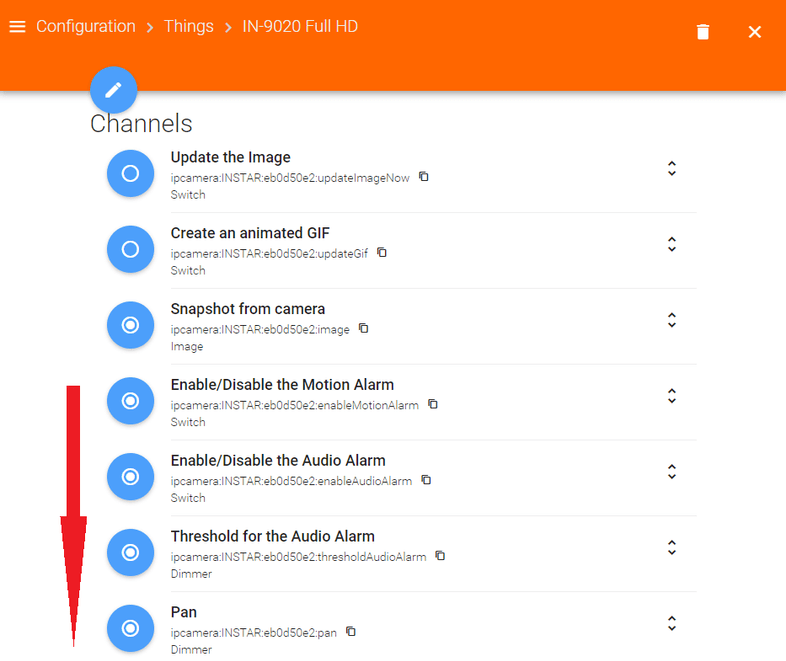
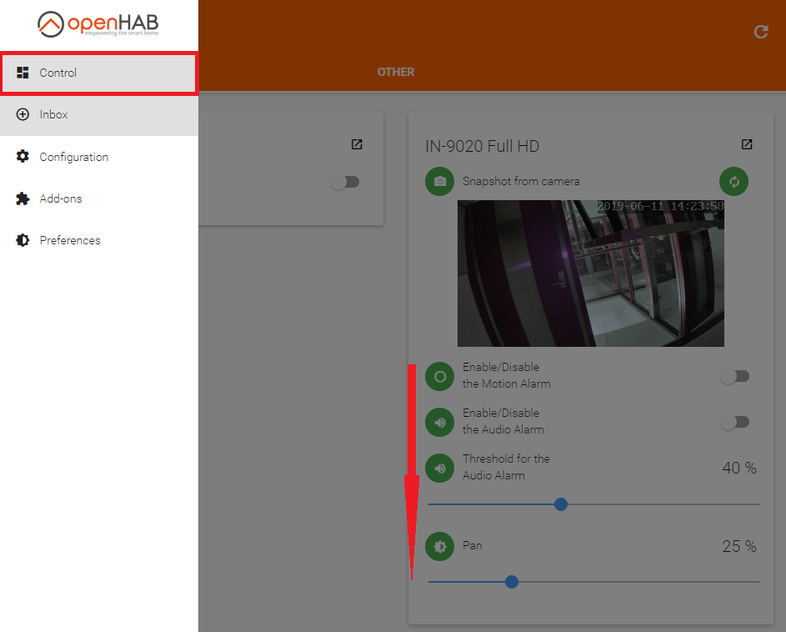
- All Items will then be displayed on the Control Panel and allow you to control your INSTAR IP camera:
