ioBroker Preparation
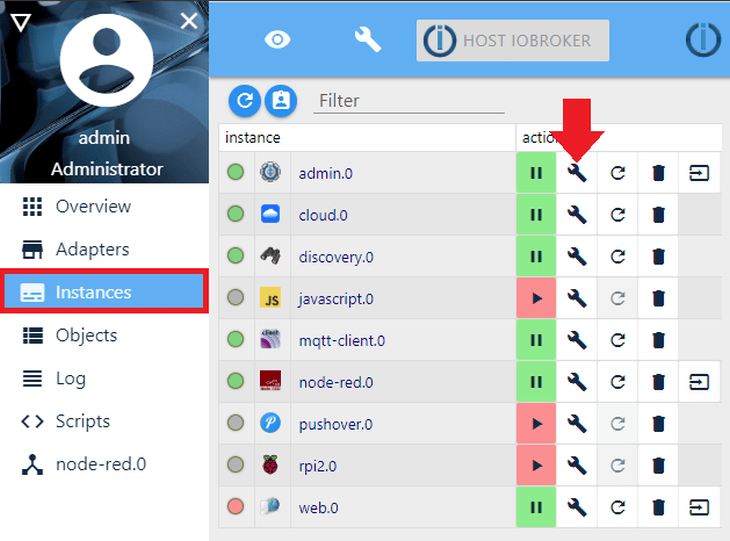
MotionEye uses the port 8081 to stream your cameras video. Since this is also the default port for the ioBroker Admin Panel we have to change that beforehand to avoid a clash. Open the Admin Panel and change to the Instances Tab. Click on the wrench icon to edit the panel settings:
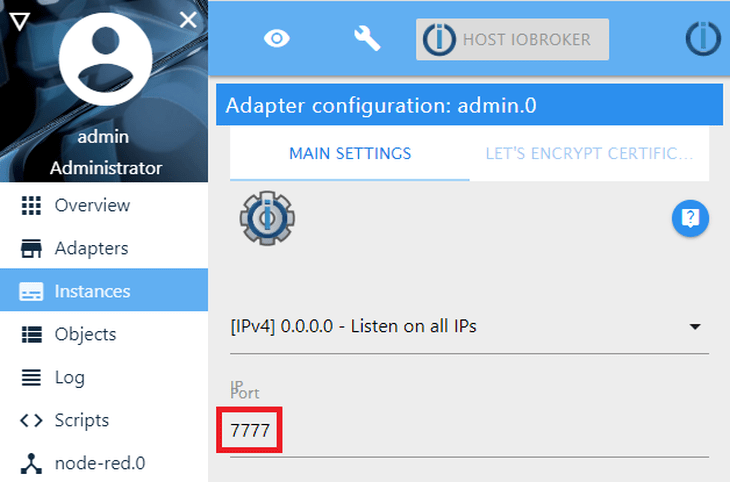
Change the Port to something else:
Installation of motionEye
The Software MotionEye can be directly installed under Raspian on your Raspberry Pi. First we need to install ffmpeg and v4l-utils (might already be installed on your version of Raspbian).
- Install ffmpeg and v4l-utils
sudo apt-get install ffmpeg v4l-utils- Then install libmariadbclient18 and libpq5 required by motion:
sudo apt-get install libmariadbclient18 libpq5- Install motion:
wget https://github.com/Motion-Project/motion/releases/download/release-4.1.1/pi_stretch_motion_4.1.1-1_armhf.deb

sudo dpkg -i pi_stretch_motion_4.1.1-1_armhf.deb- Install the dependencies from the repositories:
apt-get install python-pip python-dev libssl-dev libcurl4-openssl-dev libjpeg-dev libz-dev- Install motioneye, which will automatically pull Python dependencies (tornado, jinja2, pillow and pycurl):
sudo pip install motioneye- Prepare the configuration directory:
sudo mkdir -p /etc/motioneye

sudo cp /usr/local/share/motioneye/extra/motioneye.conf.sample /etc/motioneye/motioneye.conf- Prepare the media directory:
sudo mkdir -p /var/lib/motioneye- Add an init script, configure it to run at startup and start the motionEye server:
sudo cp /usr/local/share/motioneye/extra/motioneye.systemd-unit-local /etc/systemd/system/motioneye.service
sudo systemctl daemon-reload
sudo systemctl enable motioneye
sudo systemctl start motioneye- To upgrade to the newest version of motionEye, just issue:
sudo pip install motioneye --upgrade
sudo systemctl restart motioneye
Adding your IP Camera
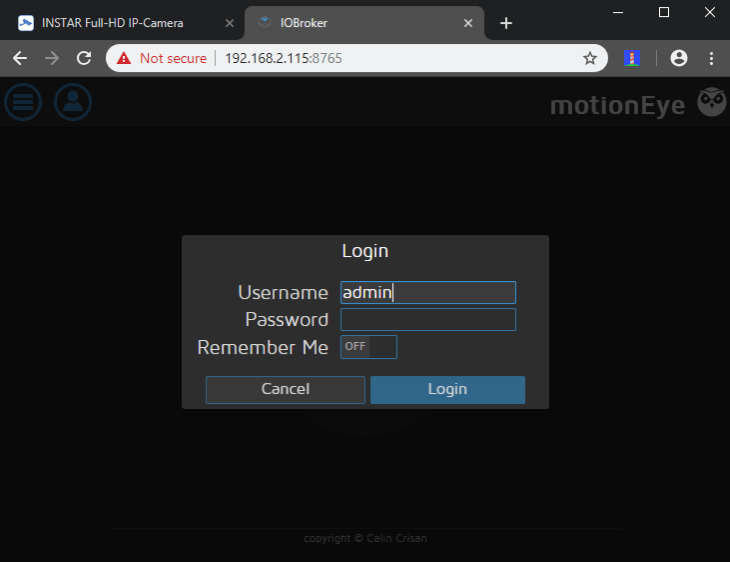
Open the MotionEye Interface with your web browsers by typing in your Raspberry Pi's IP address followed by the Port 8765 - e.g. http://192.168.2.115:8765. The default login is admin without a password:
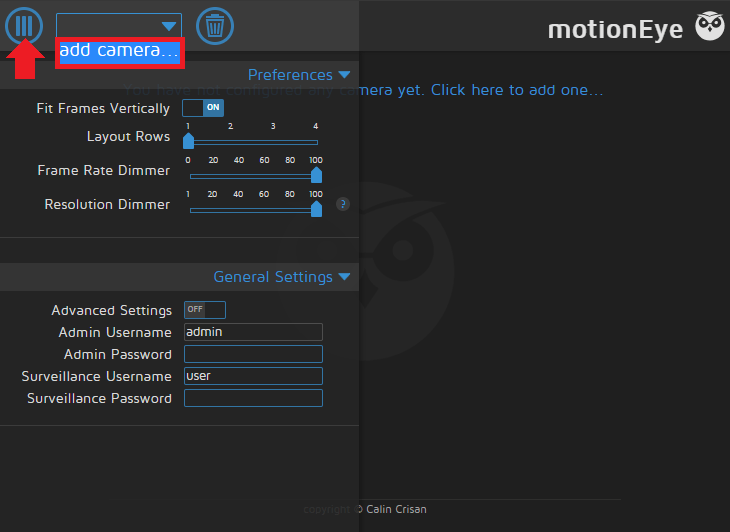
Click on the Icon in the top left, open the drop-down menu to the right and select to add a camera:
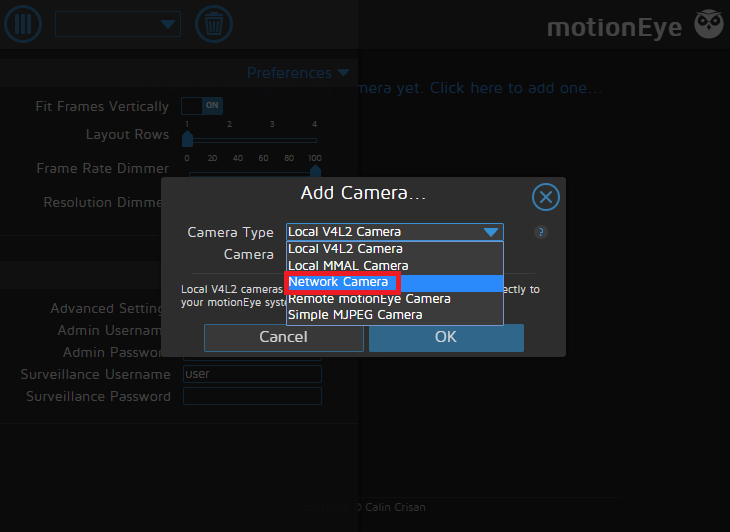
Select Network Camera as Camera Type:
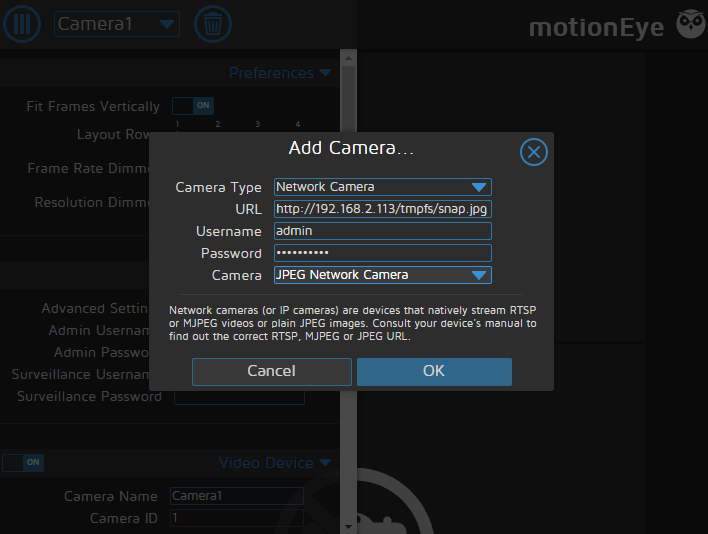
JPG Camera
To add your VGA Camera (like IN-3011, IN-2905, etc.) type in your cameras IP Address, prepend the http:// and add a snapshot.cgi:
http://192.168.2.115/snapshot.cgi
For HD (like IN-6014 HD, IN-5905 HD, etc.) and Full HD (like IN-8015 FHD, IN-9008 FHD, etc.) camera models add /tmpfs/snap.jpg for high resolution (your Raspberry Pi might not be fast enough to handle more than one 1080p camera at full resolution), /tmpfs/auto.jpg for medium resolution and /tmpfs/auto2.jpg for low resolution:
http://192.168.2.115/tmpfs/snap.jpghttp://192.168.2.115/tmpfs/auto.jpghttp://192.168.2.115/tmpfs/auto2.jpg
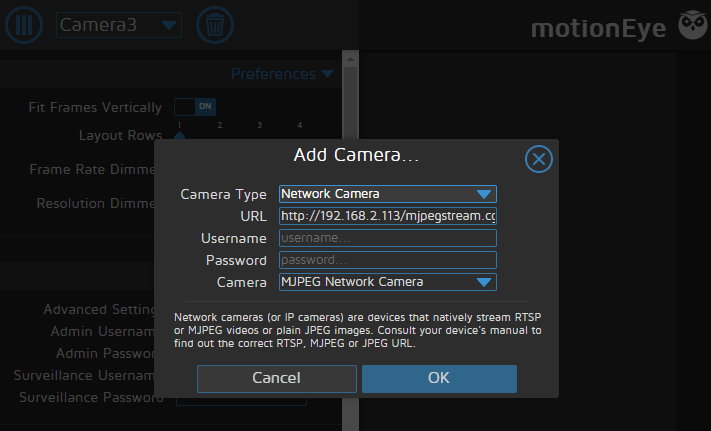
MJPG Camera
To add your VGA Camera (like IN-3011, IN-2905, etc.) type in your cameras IP Address, prepend the http:// and add a videostream.cgi (you can either add the camera login at the end of the command - as seen below, or use the login mask that motionEye offers)
http://192.168.2.115/videostream.cgi?user=admin&pwd=instar
For HD (like IN-6014 HD, IN-5905 HD, etc.) and Full HD (like IN-8015 FHD, IN-9008 FHD, etc.) camera models add /mjpegstream.cgi?-chn=11 for high resolution (your Raspberry Pi might not be fast enough to handle more than one 1080p camera at full resolution), /mjpegstream.cgi?-chn=12 for medium resolution and /mjpegstream.cgi?-chn=13 for low resolution:
http://192.168.2.115/mjpegstream.cgi?-chn=11&-usr=admin&-pwd=instarhttp://192.168.2.115/mjpegstream.cgi?-chn=12&-usr=admin&-pwd=instarhttp://192.168.2.115/mjpegstream.cgi?-chn=13&-usr=admin&-pwd=instar
RTSP Camera
For HD (like IN-6014 HD, IN-5905 HD, etc.) and Full HD (like IN-8015 FHD, IN-9008 FHD, etc.) camera models, prepend the rtsp:// and add /11 for high resolution (your Raspberry Pi might not be fast enough to handle more than one 1080p camera at full resolution), /12 for medium resolution and /13 for low resolution:
http://192.168.2.115/11http://192.168.2.115/12http://192.168.2.115/13
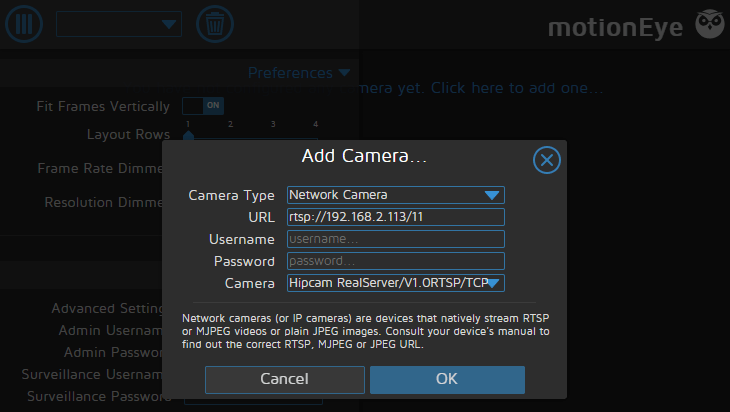
- In the example above, we did not need to add the camera login to access the RTSP stream, since we deactivated it in the Web User Interface
If your camera does not show up right away. you might have to reboot your Pi.
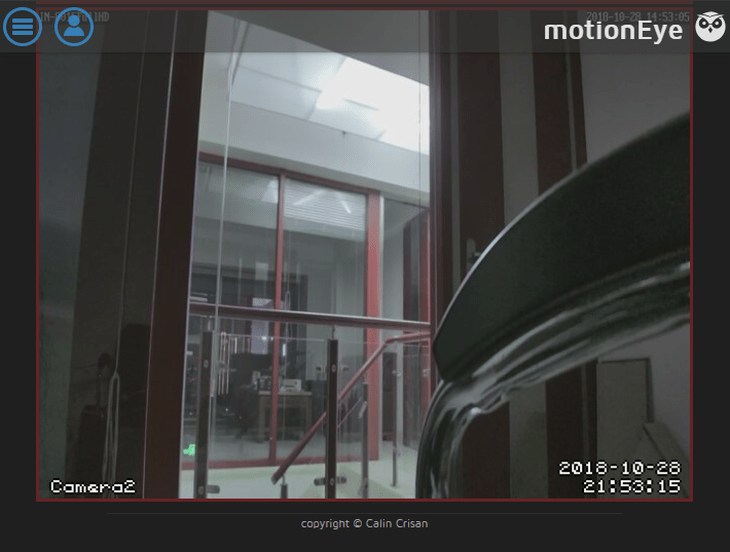
Adding motionEye to ioBroker Vis
We already added a JPG stream of our cameras live video to the ioBroker Visualization panel. Now we are able to replace that with the motionEye live stream. Open your ioBroker Overview panel and click on Edit Visualization:
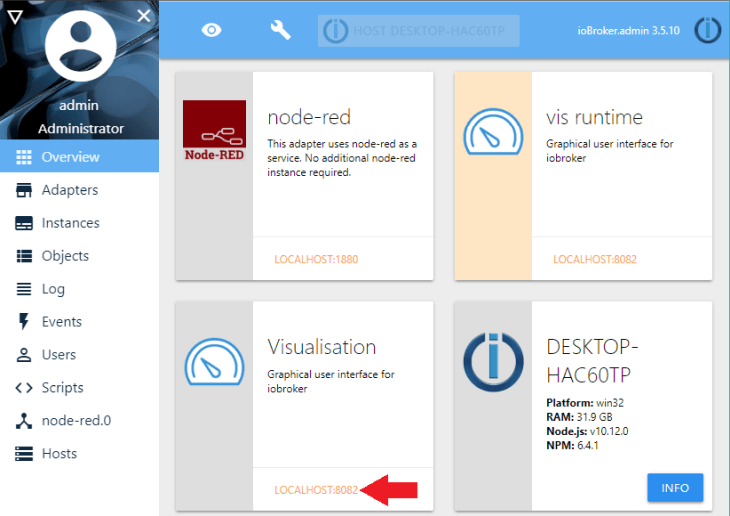
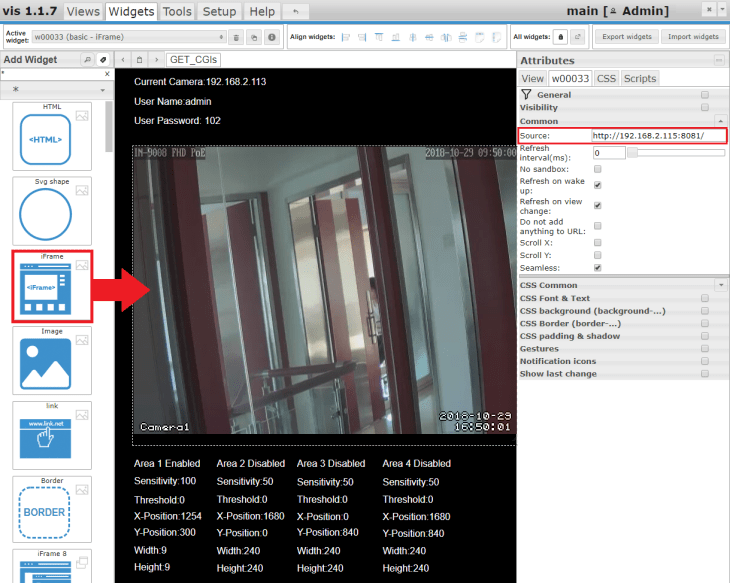
Drag and drop an iFrame Widget and type in your Raspberry Pi's (the one with motionEye installed) IP address followed by the port 8081 as source (for camera two choose port 8082 etc.):
