UltraHD Series (2K+ 1440p & 4K 2160p) Web User Interface
System Menu
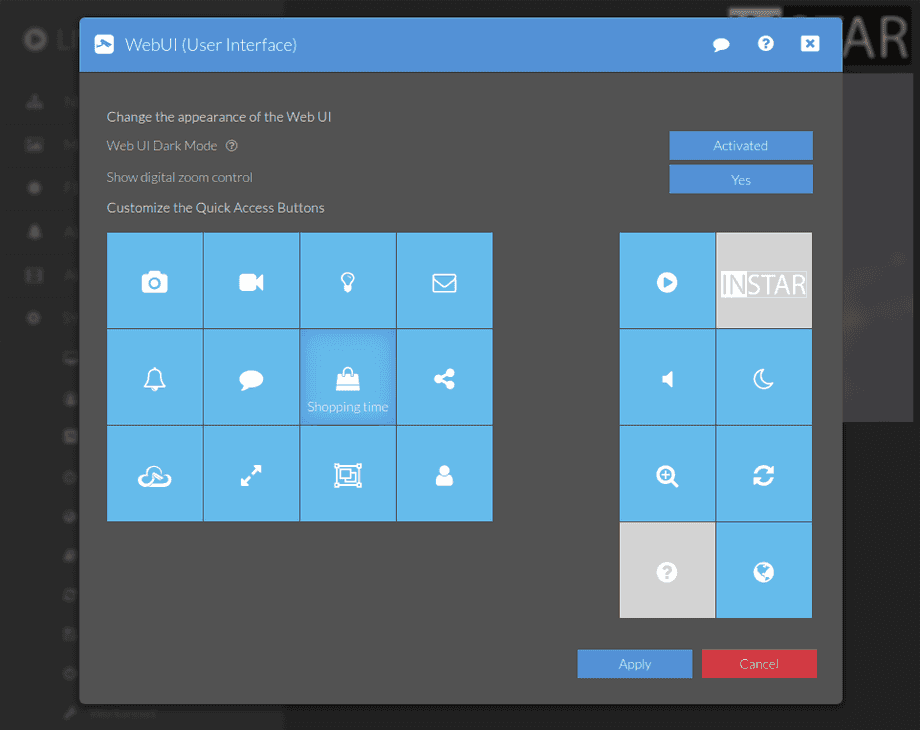
UI Tiles for quick setting for your INSTAR 1440p FullHD IP camera. Set here which tiles should be displayed to the right of the live video.
Your camera provides a fine-grained access rights system that allows you to restrict access to certain menus of the web user interface and its underlying CGI commands. The minimum permission to access this menu is:
- User Permissions:
System Settings
User permissions can be modified in the user menu.
Personalize the Quick Access Bar
INSTAR Weboberfläche: Nutzen Sie Widgets zum individualisieren der WebUI Ihrer Überwachungskamera
The access bar allows you to quickly access frequently used functions on the right side of the main page with one click. You can customize the arrangement as well as the selection in this menu according to your needs.
Drag & Drop
To adjust the positions or the individual buttons in the access bar, you just need to drag the desired button to the desired position.
Remark: With Internet Explorer as well as the Edge browser you must first select a button with a click. It will then be highlighted in orange. Then select the position in which you want to place the marked button. Valid options are displayed in orange when you move the mouse over them.
Quick Access Tiles
WebUI Einstellungen | Beschreibung |
|---|---|
| Snapshot | Use the Snapshot tile to take a fresh snapshot from your cameras live video and save it to your download folder. |
| Recording | Start and manually stop a video recording to your cameras internal SD card. |
| IR-LEDs | Manually activate or deactivate your cameras IR LEDs. The IR LEDs will only turn on when it is dark. |
| Alarm Emails | Activate or deactivate the alarm notification by email. |
| Messages | Review the latest notifications that the webUI displayed in the top right corner of the browser window. |
| Update | Use the auto-updater to update your cameras firmware when an update becomes available. |
| Web Shop | Add a link to the INSTAR web shop. |
| Tour | When you programmed a pan&tilt tour for your camera you can use the Tour tile to trigger it. |
| Language | Set the language the webUI is displayed in. |
| WebUI Mode | Manually toggle between the dark and bright webUI display mode. |
| INSTAR Cloud | Add a link to your optional INSTAR Cloud account. |
| Fullscreen | Toggle the webUIs full-screen mode. |
| Object Tracking | If you have the Object Detection active you can use this tile to display detected object in your cameras live video stream. |
| My Account | Access your User Account configuration menu. |
| Play | Click this tile to pause or resume your cameras live video. |
| Mute | Click this tile to mute or un-mute your cameras microphone. |
| Digital Zoom | If your camera does not have an optical zoom lense you can use this digital zoom to enlarge areas in your cameras live video. |
| Alarm | Use this tile to pause all alarm detections - motion, noise, PIR, etc. If the alarm is paused a red bell icon will be displayed on to of your cameras live video. |
| Relay | If your camera model has an alarm output relay you can use this tile to manually open or close this relay. |
| Alarm Areas | Just like the object tracking tile that enables an overlay of detected objects in your cameras live video you can use this tile to display the alarm area that triggered the last motion detection. Use this function to effectively fine-tune your alarm areas setup. |
Digital Zoom
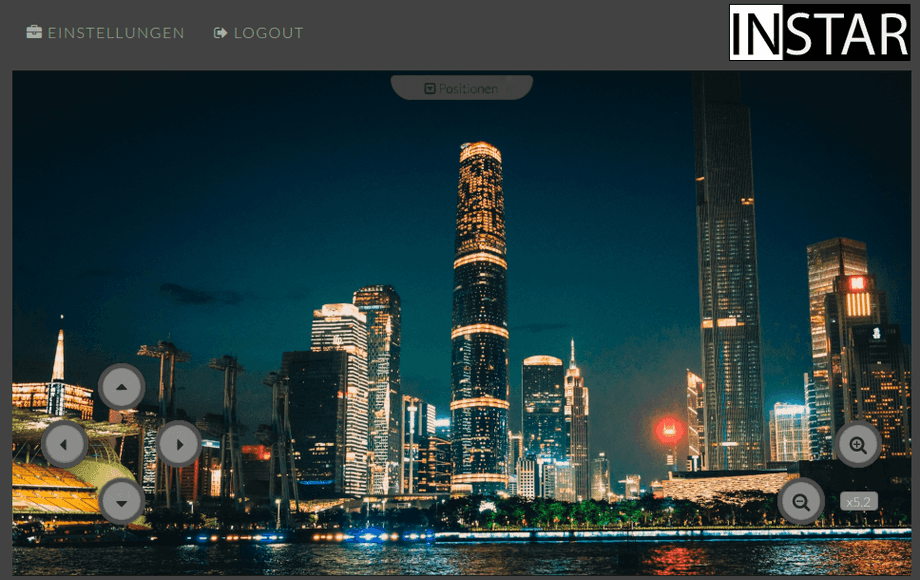
Activate the digital Zoom controls in the lower right to be able to increase the center of your cameras live video by up to 6 times:

