MQTTv5 Websocket HTML Client
Q: Is it possible to use MQTT to control my camera from my webpage?
A: The new Mosquitto MQTTv5 Broker that is pre-installed on your 2k+ WQHD (or higher) supports tunneling MQTT through a Websocket - this makes the powerful MQTT protocol web browser-native. All you need to do in your webpage is to embed the script from MQTT.js and connect it tour your MQTT Broker.
Websocket-based MQTT Client INSTAR MQTT Camera
Download the Repository from Github.
Use the MQTTv5 API to control your INSTAR 2k+ WQHD (or higher) IP camera from an browser-native HTML webpage. This repository is a clone of the HiveMQ MQTT Webclient and uses MQTT.js to help you connect to your camera's MQTT broker.
Check Out: How to use the MQTTv5 Websocket API to control your INSTAR MQTT camera through an Elgato Streamdeck
How to use it
Put this repository into your web server's web root and open the index.html file inside your web browser - that's it.
Configuration
To make using this client more convenient you can pre-configure the client with the ./config.js file. Here you can add your broker configuration, e.g.:
mqtt_broker = '192.168.2.115' // IP address of your INSTAR camera
mqtt_broker_ws_port = '1885' // Websocket MQTT server port your camera uses
mqtt_broker_username = 'admin' // MQTT broker login
mqtt_broker_password = 'instar' // MQTT broker login
mqtt_lwt = 'webclient/lwt' // last-will-topic for the web-client
mqtt_lwt_msg = '{"val":"offline"}' // last-will-topic message payload for the web-client
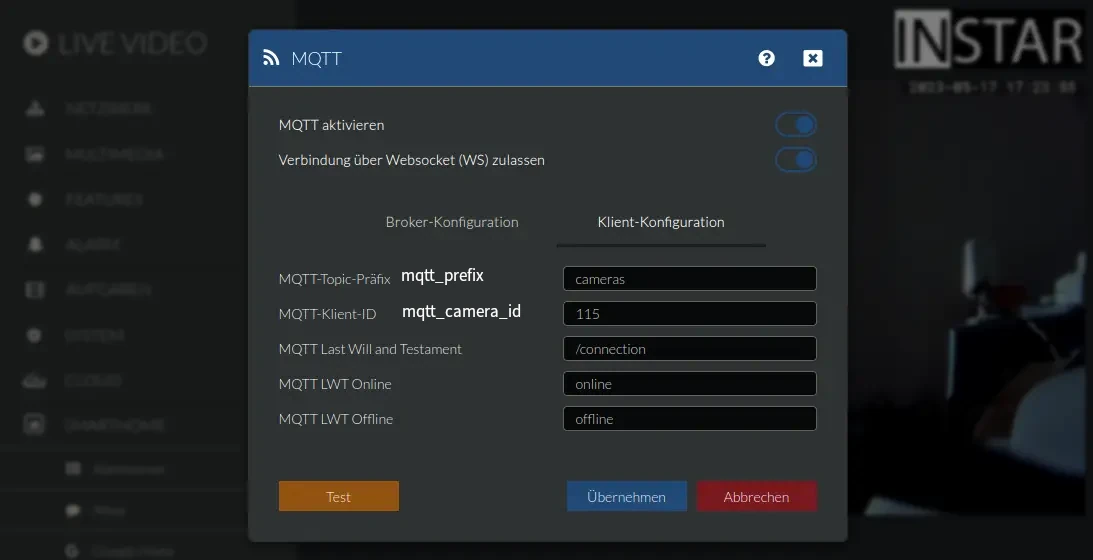
mqtt_prefix = 'cameras/' // MQTT prefix you configured for the camera MQTT client
mqtt_camera_id = '115/' // MQTT client ID you configured for the camera MQTT client
mqtt_qos = 1 // Default Quality-of-Service setting for the web-client
mqtt_retain = false // Default message retention setting for the web-client
mqtt_sub_topic = mqtt_prefix + '#' // default MQTT topic subscription for the web-client
mqtt_pub_topic = mqtt_prefix + mqtt_camera_id +'multimedia/privacy/region1/enable' // default MQTT publish topic for the web-client
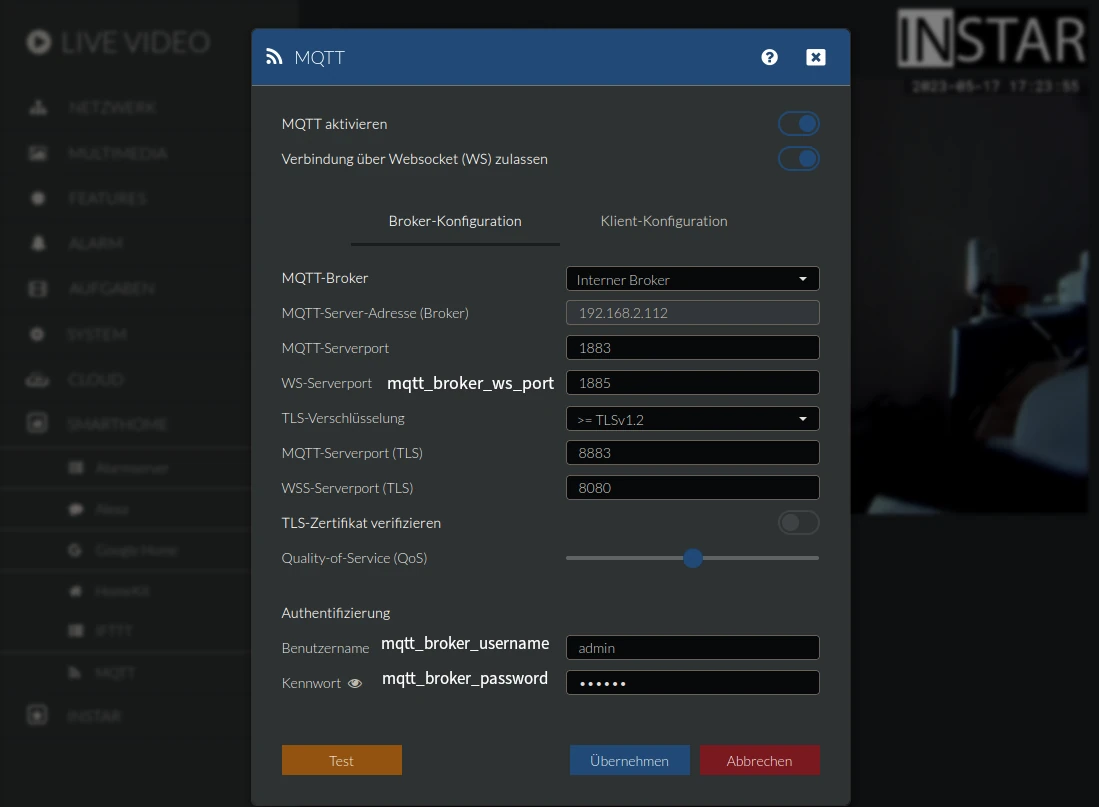
mqtt_pub_payload = '{"val":"1"}' // default MQTT publish topic message payload for the web-clientThe broker configuration here as the MQTT prefix and camera ID has to match your camera's MQTT configuration:
Start the Web Client
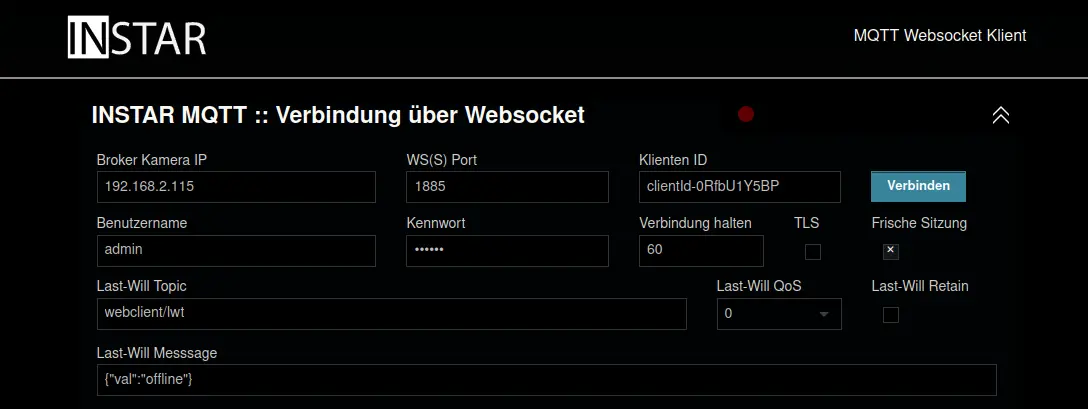
The web client should now be pre-configured and ready to use. Click on Verbinden to connect to your camera broker:
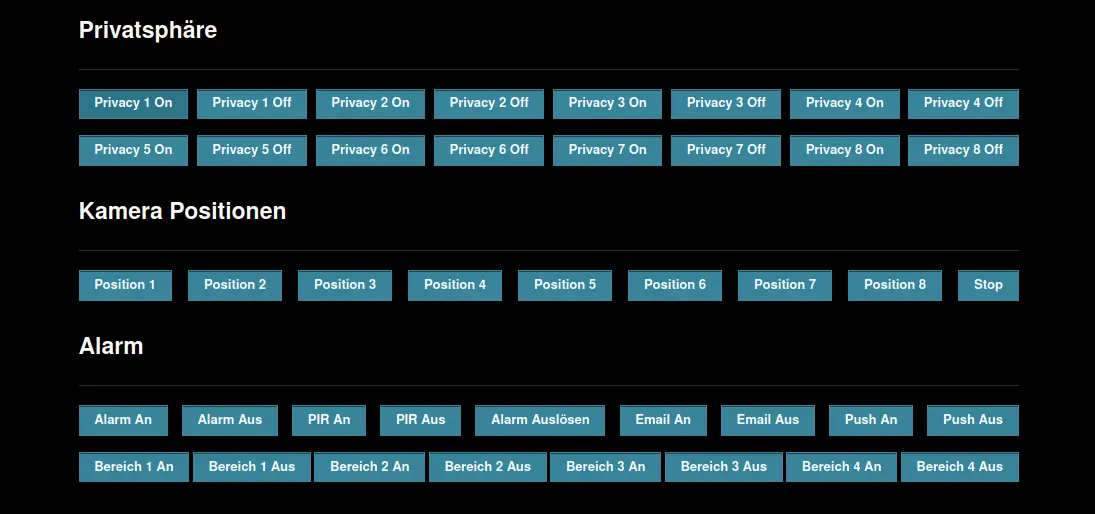
The configuration file ./config.js already sets up a couple of buttons that you can try to see if you are able to reach and control your camera. Click to activate an privacy area and see it show up in your camera's live video:
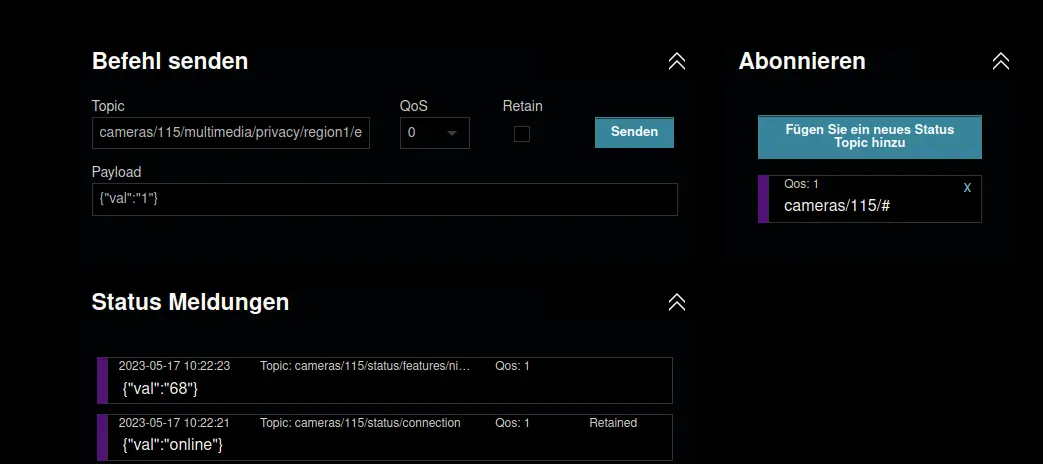
Feel free to replace any of the pre-configured commands with commands from the MQTTv5 API. Use the Befehl senden area to quickly try out any command before creating a button for it in the ./index.html file:

You can also add a MQTT Topic wildcard subscription to listen in to all commands that your camera is receiving/sending: