MQTT Sensor Video Overlay
Q: I am using an MQTT/Zigbee/Z-Wave sensor and would like to display its readings as an overlay over the video image of my camera. Is it possible to add a data stream to the video image of my camera?
Make your camera the heart of your smart home
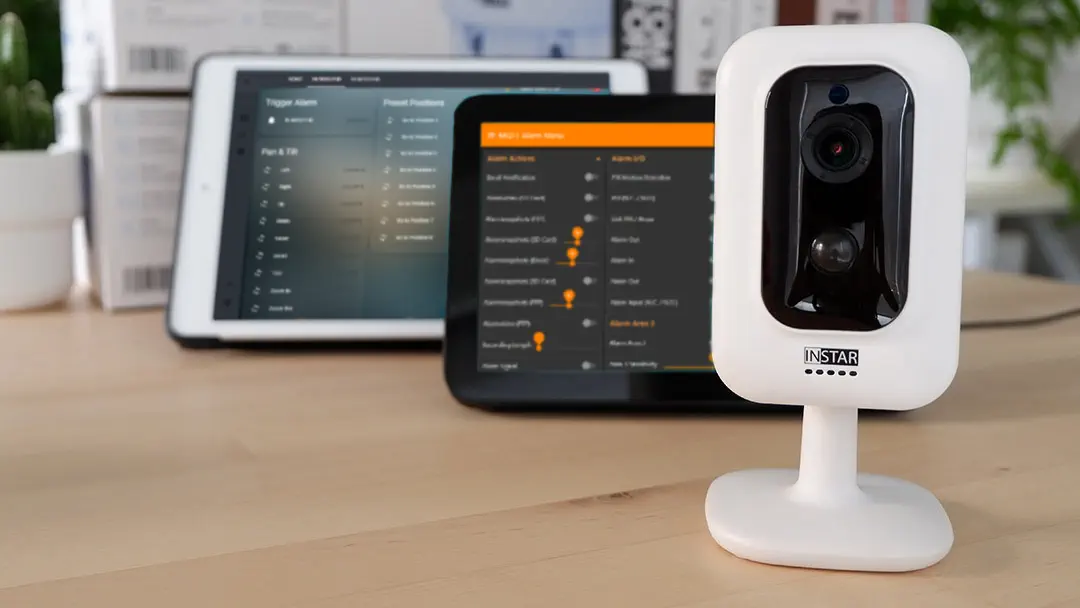
Using the MQTT interface of your INSTAR Full HD cameras you can connect them to an existing smarthome system (Home Assistant, OpenHAB, Node-RED, Athom Homey, Homematic, ioBroker, Loxone, homee) can be added. Or even make it the main broker for your MQTT sensors. MQTT allows you to automate ALL functions of your camera and link them to other services in your smarthome.
Control your camera via the IFTTT online service

On the IFTTT platform, we provided a service called INSTAR. The INSTAR applets provide you with the ability to control some settings of your INSTAR camera or INSTAR Cloud with IFTTT. You can connect INSTAR with triggers for location (Geo Location) and date & time, send notifications and much more. For example, you can connect INSTAR applets to the IFTTT location service and automatically disable the alarm when you arrive home. You can also use the INSTAR applets to create your own automation and connect them to other third-party applets.
A: Here is an example how to solve this problem in Node-RED via the INSTAR MQTT Interface and the Image Overlay.
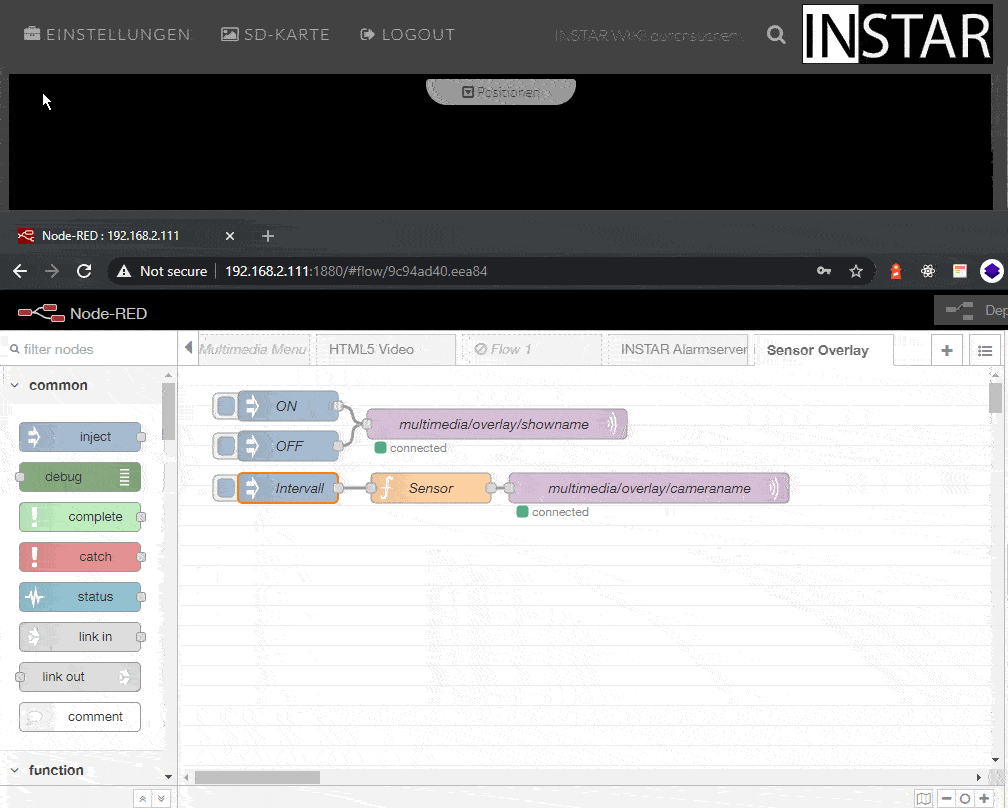
Enable the overlay
In the example above, I added an option to enable and disable the sensor overlay via the multimedia/overlay/showname MQTT-Topic. You can replace the Inject Nodes with incoming triggers - for example, when the sensor readout exceeds a safe value:
Node-RED Flow Export
[{"id":"fe5510d0.fada1","type":"mqtt out","z":"9c94ad40.eea84","name":"multimedia/overlay/showname","topic":"cameras/117/multimedia/overlay/showname","qos":"1","retain":"false","broker":"7553a41d.22b8bc","x":319,"y":58,"wires":[]},{"id":"e3f4cbf0.f0d0d8","type":"inject","z":"9c94ad40.eea84","name":"OFF","props":[{"p":"payload"}],"repeat":"","crontab":"","once":false,"onceDelay":0.1,"topic":"","payload":"{\"val\":\"0\"}","payloadType":"json","x":110,"y":80,"wires":[["fe5510d0.fada1"]]},{"id":"46aa340.db0f0cc","type":"inject","z":"9c94ad40.eea84","name":"ON","props":[{"p":"payload"}],"repeat":"","crontab":"","once":false,"onceDelay":0.1,"topic":"","payload":"{\"val\":\"1\"}","payloadType":"json","x":110,"y":40,"wires":[["fe5510d0.fada1"]]},{"id":"7553a41d.22b8bc","type":"mqtt-broker","name":"192.168.2.117","broker":"192.168.2.117","port":"8883","tls":"c411fab7.e16228","clientid":"","usetls":true,"compatmode":true,"keepalive":"60","cleansession":true,"birthTopic":"","birthQos":"0","birthPayload":"","closeTopic":"","closeQos":"0","closePayload":"","willTopic":"","willQos":"0","willPayload":""},{"id":"c411fab7.e16228","type":"tls-config","name":"","cert":"","key":"","ca":"","certname":"mqtt_client-new.crt","keyname":"","caname":"","servername":"","verifyservercert":false}]Adding the data stream
I use a random number generator to simulate the sensor readout. The readout is then sent as a payload to a MQTT Out node for the MQTT-Topic multimedia/overlay/cameraname - replacing the camera name in the camera image with the sensor readout.
Node-RED Flow Export
[{"id":"ad54e87a.837728","type":"mqtt out","z":"9c94ad40.eea84","name":"multimedia/overlay/cameraname","topic":"cameras/117/multimedia/overlay/cameraname","qos":"1","retain":"false","broker":"7553a41d.22b8bc","x":471,"y":122,"wires":[]},{"id":"a4fdb5a5.dd1ee8","type":"function","z":"9c94ad40.eea84","name":"Sensor","func":"random=Math.round(Math.log(Math.floor(Math.random() * 100) + 1) * 1000) / 1000;\nmsg.payload='{\"val\":\"Rad%3A%20'+ random + '%20Bq\"}'\nreturn msg;","outputs":1,"noerr":0,"initialize":"","finalize":"","x":253,"y":122,"wires":[["ad54e87a.837728"]]},{"id":"7c6c476.68d89b8","type":"inject","z":"9c94ad40.eea84","name":"Intervall","props":[{"p":"payload"}],"repeat":"","crontab":"","once":false,"onceDelay":"1","topic":"","payload":"","payloadType":"date","x":110,"y":122,"wires":[["a4fdb5a5.dd1ee8"]]},{"id":"7553a41d.22b8bc","type":"mqtt-broker","name":"192.168.2.117","broker":"192.168.2.117","port":"8883","tls":"c411fab7.e16228","clientid":"","usetls":true,"compatmode":true,"keepalive":"60","cleansession":true,"birthTopic":"","birthQos":"0","birthPayload":"","closeTopic":"","closeQos":"0","closePayload":"","willTopic":"","willQos":"0","willPayload":""},{"id":"c411fab7.e16228","type":"tls-config","name":"","cert":"","key":"","ca":"","certname":"mqtt_client-new.crt","keyname":"","caname":"","servername":"","verifyservercert":false}]Overlay Position
If you need to position the overlay at the bottom of the image, you can use the following CGI SET command:
/param.cgi?cmd=setoverlayattr&-region=1&-show=1&-name=Rad%3A%204.563%20Bq&-place=1
/param.cgi?cmd=setoverlayattr&-region=1&-show=1&-name=Rad%3A%204.563%20Bq&-place=0
The parameter place places the overlay either at the top or bottom of the left edge of the video image. To read out the current setting, you can use the following GET command:
/param.cgi?cmd=getoverlayattr&-region=1