INSTAR MQTT Server with CloudMQTT
So far we always set up our own local MQTT broker like HiveMQ or Mosquitto for use as an external MQTT broker for our INSTAR Full HD Camera. CloudMQTT on the other hand are managed Mosquitto servers in the cloud. CloudMQTT let you focus on the application instead of spending time on scaling the broker or patching the platform.
Creating an MQTT Instance
To get started with CloudMQTT you first have to decide on a payment plan. For this tutorial we are going to use the Free Plan for it will be sufficient for our camera setup.
Once you created an account and chosen your plan you are now able to Create New Instance from your account:

Select a name and tags for your instance and confirm that you want to use the free tier:

Next you have to create a region where your instance should be hosted. Choose a location nearest to you:

Verify your settings and click on Create Instance to continue:

Back in the instances overview click on the instance that you just created:

The Details tab shows you all the information that we need to connect our cameras:

Debugging CloudMQTT
To check if we can connect to the server we can use one of the debug tools we presented earlier. I am going to use MQTT.fx and add a new broker with the connection details I was given above:
- Broker Address:
farmer.cloudmqtt.com - User Name:
abcdefg - Password:
hijklmnop - Port:
10259

Once I connect MQTT.fx I am able to see the new connection in the CloudMQTT server log:

Connecting our Cameras
Now that we know that the server is running and we are able to connect to it, we can start configuring our cameras to use this service. Open the MQTT Broker Configuration in your camera's web user interface and add the same information:

Once you saved your settings you should see that your cameras starts publishing all retained STATUS Topics (make sure that you activated the debug mode in the CloudMQTT server log):

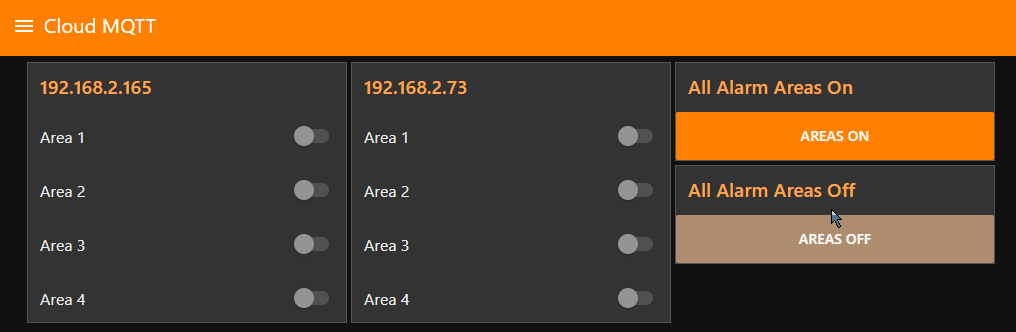
Working with Node-RED
You can now connect every compatible MQTT Software to the CloudMQTT Broker to control every connected camera. In the following we will show how to connect Node-RED as an example.
You can download the Node-RED flow that I am going to use from here: Download Flow.
We already used this Node-RED flow in our HiveMQ Tutorial. The only thing that we have to change now to make it work with CloudMQTT is to add the new MQTT Broker configuration to Node-RED. Do this by adding a new MQTT Broker to every MQTT node inside the flow:

Use the Server Address and MQTT Port as given be CloudMQTT:

And add the Username and Password that CloudMQTT assigned to you:

Once you deployed those changes in Node-RED, you should be able to see the same switches and buttons to control your cameras alarm areas on the Node-RED dashboard that we created HiveMQ Tutorial (note that you have to replace the cameras MQTT IDs/MAC Adresses with those of your own cameras). For more details, please continue reading our Node-RED Tutorial.