Software
Home Automation
IP Symcon Smarthome
- Home Automation
- Introduction
- How does it work
- Use external sensors
- Activate Nightvision only when Motion is detected
- Schedule different Positions
- Use different Detection Areas for each Position
- Use different Sensitivities for Day & Night
- Turn off all Cameras when you arrive home
- Use external Sensors to turn your Camera when Motion is detected
- Use external Sensors to trigger Alarm Recordings
- Nach Geräuschquellen suchen
- Manually disable all alarm functions for all your cameras
- Switch between PIR and Software Motion Detection
Make your camera the heart of your smart home
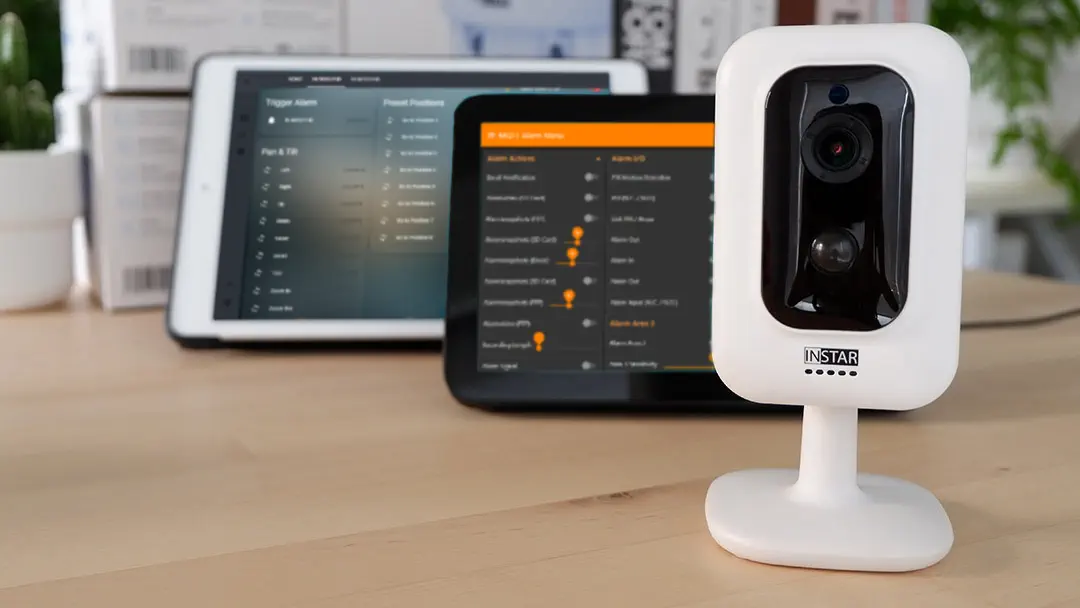
Using the MQTT interface of your INSTAR Full HD cameras you can connect them to an existing smarthome system (Home Assistant, OpenHAB, Node-RED, Athom Homey, Homematic, ioBroker, Loxone, homee) can be added. Or even make it the main broker for your MQTT sensors. MQTT allows you to automate ALL functions of your camera and link them to other services in your smarthome.
Control your camera via the IFTTT online service

On the IFTTT platform, we provided a service called INSTAR. The INSTAR applets provide you with the ability to control some settings of your INSTAR camera or INSTAR Cloud with IFTTT. You can connect INSTAR with triggers for location (Geo Location) and date & time, send notifications and much more. For example, you can connect INSTAR applets to the IFTTT location service and automatically disable the alarm when you arrive home. You can also use the INSTAR applets to create your own automation and connect them to other third-party applets.
Introduction
The IP-Symcon software is the complete solution in the field of home automation. Combine products of all renowned manufacturers, realize your wishes, and allow your home to think for itself. A multitude of assistants and tools allow a comfortable configuration with a focus on clarity and security. Needless to say, privacy is a must with the optional Cloud connection.
The IP Symcon Software can be used on the proprietary Hardware called SymBox Neo. The SymBox Neo is the complete solution with the integrated SymOS specially developed for IP-Symcon.
Alternatively, start by downloading and installing the IP-Symcon Software version 5.x on Windows, macOS, Linux (Debian), Raspberry Pi, QNAP or Synology.
Example: Installation on a RaspberryPi
We will be using the INSTAR Module to connect the IP Symcon installation with an INSTAR IP camera.
If you are looking for a deep dive into setting up your IP Symcon automation with an INSTAR IP camera, switch to our FULL GUIDE instead.
How does it work
The examples below use CGI Commands to have your Smarthome automate camera functions. To use these commands you have to add your camera's IP Address, HTTP Port and Admin Login to it - e.g. if your cameras IP address is 192.168.178.121, the camera LAN port is 8081, the login is admin/instar and you want to send the command that triggers an alarm on your camera param.cgi?cmd=pushhostalarm this will look like this:
- WQHD 2k+ Series:
- http://192.168.178.121:8081/param.cgi?cmd=pushhostalarm&-user=admin&-pwd=instar
- HD & Full HD Series:
- http://192.168.178.121:8081/param.cgi?cmd=pushhostalarm&-usr=admin&-pwd=instar
Before you enter this command into your Smarthome configuration, you can first copy&paste it into the address bar of your web browser and press enter. If you receive an OK from your camera and see the effect you wanted - in the case above you should see an alarm in your camera's System Log and all active Alarm Actions should be triggered - you are good to proceed configuring your Smarthome.
1. Use external sensors
Man kann durch einen Bewegungsmelder der IP-Symcon bekannt ist, sei die nun KNX, LCN, Homematic oder alle Systeme die von IP-Symcon unterstützt werden, die Kamera auf eine bestimmte Position anfahren. Angenommen in der Einfahrt löst ein Bewegungsmelder aus kann dann die Kamera automatisch auf den passenden Bildbereich schwenken.

Hierzu wird ein Ereignis in IP-Symcon angelegt. Als Auslöser wird die Variable des Bewegungsmelders ausgewählt als Instanz die Kamera selber. Mehr Informationen finden Sie auch in der README des INSTAR Addons.

2. Activate Nightvision only when Motion is detected
Activate your cameras night vision according to a schedule or triggered by an external sensor integrated in home automation system:

The activation of the night vision in case of an alarm is of course only possible if the camera has an internal PIR sensor for motion detection, or if you use the alarm signal of an external sensor in home automation to "focus" the camera. The advantage - the camera is inconspicuous at night and the IR light attracts no insects / spiders. And the power consumption is of course also pressed.

3. Schedule different Positions
Scheduled day and night position - guard the front door when I'm not at home but I turn the camera to my carport when I'm back from work:


4. Use different Detection Areas for each Position
In combination with the scheduled day and night position (see above) you can also activate different motion detection areas - in the example the areas 1 & 2 are activated during the day and the areas 3 & 4 at night:


5. Use different Sensitivities for Day & Night
Since there are often different sensitivities needed for the motion detection during day and night conditions, you can also adjust these - in the example to 75% during the day and 25% at night:


6. Turn off all Cameras when you arrive home
Either schedule or manually disable all alarm detection areas and the PIR sensor, if you do not want to trigger an alarm:

Please note for the models IN-6014 HD and IN-9020 Full HD, instead of the PIR sensor - setpirattr&-pir_enable=1 - the alarm input must be switched: cmd=setioattr&-io_enable=1. The same applies to cameras where an external PIR sensor is attached to the alarm input.

7. Use external Sensors to turn your Camera when Motion is detected
Let your camera move between positions depending on system variables in home automation system. For example - when the door sensor is tripped, look to the door, when the window sensor is triggered turn towards the window and when the external motion sensor detects a person, turn to the kitchen door:

This can be combined well with the parking position in the camera - the camera then automatically returns to the standard position after x minutes.

8. Use external Sensors to trigger Alarm Recordings
When you set up your camera to turn to a position when triggered by an external sensor, you probably want to start an alarm recording on the internal SD card to catch the intruder. This can be done by starting the manual recording through your home automation system and after a delay following up the stop command. Due to adjustable delay, the length of the alarm video is freely selectable (max. 15min):

/param.cgi?cmd=manualrec&-act=on&-time=60&-usr={USERNAME}&-pwd={PASSWORD}

/param.cgi?/cmd=manualrec&-act=off&-usr={USERNAME}&-pwd={PASSWORD}
9. Nach Geräuschquellen suchen
Wenn die Audioerkennung Ihrer Kamera auslöst, kennen Sie wahrscheinlich nicht den Ort der Geräuschquelle. Sie können in einem solchen Fall einen horizontalen (hscan) oder vertikalen (vscan) Suchlauf auslösen. Dies muss dann manuell mit der gewünschten Verzögerung wieder gestoppt werden:

Alternativ können Sie die Tourfunktion verwenden, um zwischen vordefinierten Positionen zu schwenken, die in der WebUI festgelegt wurde. Eine solche Tour kann, je nach Einstellung, max. 50 mal durchfahren werden und die Kamera stoppt danach wieder automatisch (mit Ausnahme des Modelle IN-9010 Full HD und IN-9020 Full HD, bei der die programmierte Tour so lange ausgeführt wird, bis Sie sie manuell stoppen).

10. Manually disable all alarm functions for all your cameras
If you have more than one alarm trigger activated in your camera - PIR sensor, alarm zones, audio detection, alarm input - you can activate and deactivate them simultaneously via the alarm schedule without having to address each trigger individually:

/param.cgi?cmd=setscheduleex&-ename=md&-week0=NNNNNNNNNNNNNNNNNNNNNNNNNNNNNNNNNNNNNNNNNNNNNNNN&-week1=NNNNNNNNNNNNNNNNNNNNNNNNNNNNNNNNNNNNNNNNNNNNNNNN&-week2=NNNNNNNNNNNNNNNNNNNNNNNNNNNNNNNNNNNNNNNNNNNNNNNN&-week3=NNNNNNNNNNNNNNNNNNNNNNNNNNNNNNNNNNNNNNNNNNNNNNNN&-week4=NNNNNNNNNNNNNNNNNNNNNNNNNNNNNNNNNNNNNNNNNNNNNNNN&-week5=NNNNNNNNNNNNNNNNNNNNNNNNNNNNNNNNNNNNNNNNNNNNNNNN&-week6=NNNNNNNNNNNNNNNNNNNNNNNNNNNNNNNNNNNNNNNNNNNNNNNN&-usr={USERNAME}&-pwd={PASSWORD}

/param.cgi?cmd=setscheduleex&-ename=md&-week0=PPPPPPPPPPPPPPPPPPPPPPPPPPPPPPPPPPPPPPPPPPPPPPPP&-week1=PPPPPPPPPPPPPPPPPPPPPPPPPPPPPPPPPPPPPPPPPPPPPPPP&-week2=PPPPPPPPPPPPPPPPPPPPPPPPPPPPPPPPPPPPPPPPPPPPPPPP&-week3=PPPPPPPPPPPPPPPPPPPPPPPPPPPPPPPPPPPPPPPPPPPPPPPP&-week4=PPPPPPPPPPPPPPPPPPPPPPPPPPPPPPPPPPPPPPPPPPPPPPPP&-week5=PPPPPPPPPPPPPPPPPPPPPPPPPPPPPPPPPPPPPPPPPPPPPPPP&-week6=PPPPPPPPPPPPPPPPPPPPPPPPPPPPPPPPPPPPPPPPPPPPPPPP&-usr={USERNAME}&-pwd={PASSWORD}
In this command, week0 - week6 stands for Monday through Sunday and each P is half an hour of the day the alarm schedule is active (48 x 30min = 24h). An N equals a 30-minute period in which it is disabled. The schedule activates / deactivates all alarm actions.
Update November 2019 (only for Full HD Camera models)
Due to a change in the web user interface the alarm schedule is now stored in a new variable called setbackupschedule. If you use the command above, using just setscheduleex, the active alarm schedule will be changed but this change will not be visible inside the webUI. It is recommended to always switch both variables to prevent a de-sync:
/param.cgi?cmd=setscheduleex&-ename=md&-week0=NNNNNNNNNNNNNNNNNNNNNNNNNNNNNNNNNNNNNNNNNNNNNNNN&-week1=NNNNNNNNNNNNNNNNNNNNNNNNNNNNNNNNNNNNNNNNNNNNNNNN&-week2=NNNNNNNNNNNNNNNNNNNNNNNNNNNNNNNNNNNNNNNNNNNNNNNN&-week3=NNNNNNNNNNNNNNNNNNNNNNNNNNNNNNNNNNNNNNNNNNNNNNNN&-week4=NNNNNNNNNNNNNNNNNNNNNNNNNNNNNNNNNNNNNNNNNNNNNNNN&-week5=NNNNNNNNNNNNNNNNNNNNNNNNNNNNNNNNNNNNNNNNNNNNNNNN&-week6=NNNNNNNNNNNNNNNNNNNNNNNNNNNNNNNNNNNNNNNNNNNNNNNN&cmd=setbackupschedule&-ename=md&-week0=NNNNNNNNNNNNNNNNNNNNNNNNNNNNNNNNNNNNNNNNNNNNNNNN&-week1=NNNNNNNNNNNNNNNNNNNNNNNNNNNNNNNNNNNNNNNNNNNNNNNN&-week2=NNNNNNNNNNNNNNNNNNNNNNNNNNNNNNNNNNNNNNNNNNNNNNNN&-week3=NNNNNNNNNNNNNNNNNNNNNNNNNNNNNNNNNNNNNNNNNNNNNNNN&-week4=NNNNNNNNNNNNNNNNNNNNNNNNNNNNNNNNNNNNNNNNNNNNNNNN&-week5=NNNNNNNNNNNNNNNNNNNNNNNNNNNNNNNNNNNNNNNNNNNNNNNN&-week6=NNNNNNNNNNNNNNNNNNNNNNNNNNNNNNNNNNNNNNNNNNNNNNNN&-usr={USERNAME}&-pwd={PASSWORD}12. Switch between PIR and Software Motion Detection
Most of our new cameras have both an internal, software-based motion detection and a hardware PIR (passive infrared) heat sensor to detect motion of objects that have a different surface temperature as the ambient. In most cases we recommend that you link both as they have different strengths and weaknesses and the coupling can filter many sources of false alerts.
But there are situation where one of those two ways to detect motion simply fails and does not provide any filtering effect anymore. Examples are:
- The PIR is exposed to direct sunlight through most of the day. Shadows and temperature changes trigger regular false alarms.
- The Motion Detection Areas are constantly triggered at night due to the light from passing cars.
- etc.
We can use our smarthome to automatically deactivate the problematic sensor during times where we know that their accuracy is affected. Since we probably want to use both sensors during times of the day when both work perfectly, we also have to switch the coupling on and off, accordingly.
Link between PIR and Alarm Areas
/param.cgi?cmd=setmdalarm&-aname=type&-switch=on

/param.cgi?cmd=setmdalarm&-aname=type&-switch=off
Alarm Areas Activation / Deactivation
/param.cgi?cmd=setmdattr&-name=1&-enable=1&cmd=setmdattr&-name=2&-enable=1&cmd=setmdattr&-name=3&-enable=1&cmd=setmdattr&-name=4&-enable=1

/param.cgi?cmd=setmdattr&-name=1&-enable=0&cmd=setmdattr&-name=2&-enable=0&cmd=setmdattr&-name=3&-enable=0&cmd=setmdattr&-name=4&-enable=0
PIR Activation / Deactivation
/param.cgi?cmd=setpirattr&-pir_enable=1

/param.cgi?cmd=setpirattr&-pir_enable=0
In case of the IN-6014 HD or IN-9020/10 Full HD (also camera models with attached external PIR sensors) you have to switch the alarm input instead:
/param.cgi?cmd=setioattr&-io_enable=1

/param.cgi?cmd=setioattr&-io_enable=0Discuss this article on the INSTAR Forum !