Software
Home Automation
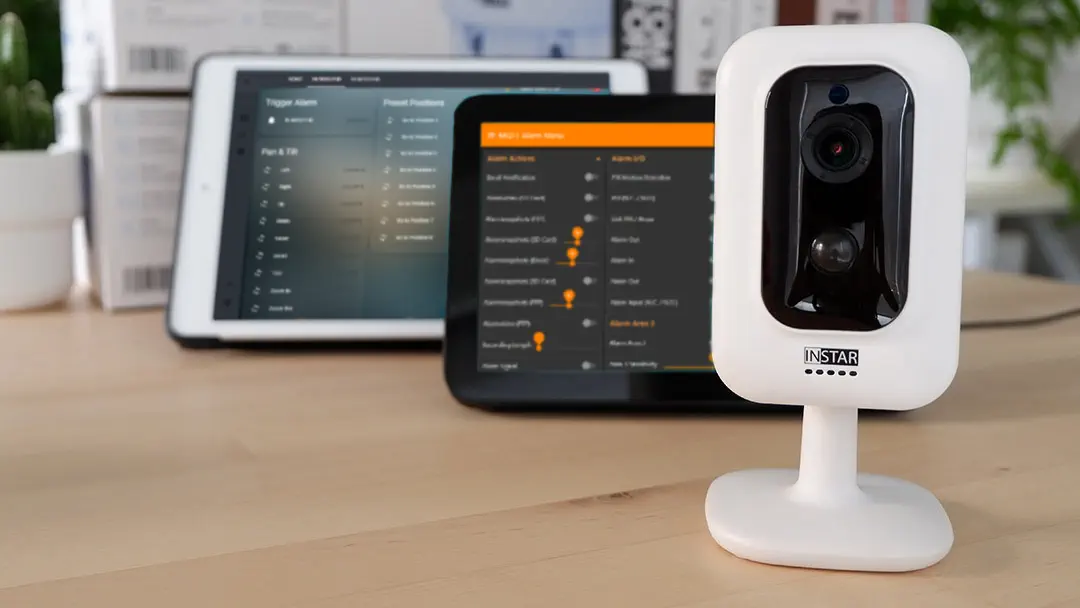
homee Home Automation
- Home Automation
- Introduction
- How does it work
- Use external Sensors
- Activate Nightvision only when Motion is detected
- Schedule different Positions
- Verwenden Sie für jede Position unterschiedliche Erkennungsbereiche
- Use different Sensitivities for Day & Night
- Deaktivieren Sie den Alarm aller Kameras, wenn Sie zu Hause ankommen
- Use external Sensors to turn your Camera when Motion is detected
- Verwenden Sie externe Sensoren, um Alarmaufzeichnungen auszulösen
- Interconnect your Cameras
- Scan for Noise Sources
- Manually deactivate all Alarm functions for all your Cameras
- Switch between PIR and Software Motion Detection
Make your camera the heart of your smart home
Using the MQTT interface of your INSTAR Full HD cameras you can connect them to an existing smarthome system (Home Assistant, OpenHAB, Node-RED, Athom Homey, Homematic, ioBroker, Loxone, homee) can be added. Or even make it the main broker for your MQTT sensors. MQTT allows you to automate ALL functions of your camera and link them to other services in your smarthome.
Control your camera via the IFTTT online service

On the IFTTT platform, we provided a service called INSTAR. The INSTAR applets provide you with the ability to control some settings of your INSTAR camera or INSTAR Cloud with IFTTT. You can connect INSTAR with triggers for location (Geo Location) and date & time, send notifications and much more. For example, you can connect INSTAR applets to the IFTTT location service and automatically disable the alarm when you arrive home. You can also use the INSTAR applets to create your own automation and connect them to other third-party applets.
Introduction
homee is a wireless gateway that allows you to communicate with wireless smart devices. You can control devices from anywhere using the free homee app.
Many devices differ in the wireless technology (Zigbee, Z-Wave, EnOcean) they use for communication. Each homee cube is responsible for a different wireless standard and can therefore talk to other devices. The white brain cube is the central unit. He collects all information and transmits it to your smartphone. So you can link very different devices together.
You can control your devices manually, with schedules and system variables or with intelligent programs called homeegrams. Those are simple If / Then clauses that you can set up from your smartphone or web browser - very similar to the IFTTT Cloud Service.
In the following paragraphs we want to show you how to connect external wireless sensors through the homee system with your INSTAR IP camera, set up time schedules for your surveillance and optimize your camera operation.
If you are looking for a deep dive into setting up your homee automation with an INSTAR IP camera, switch to our FULL GUIDE instead.
How does it work
The examples below use CGI Commands to have your Smarthome automate camera functions. To use these commands you have to add your camera's IP Address, HTTP Port and Admin Login to it - e.g. if your cameras IP address is 192.168.178.121, the camera LAN port is 8081, the login is admin/instar and you want to send the command that triggers an alarm on your camera param.cgi?cmd=pushhostalarm this will look like this:
- WQHD 2k+ Series:
- http://192.168.178.121:8081/param.cgi?cmd=pushhostalarm&-user=admin&-pwd=instar
- HD & Full HD Series:
- http://192.168.178.121:8081/param.cgi?cmd=pushhostalarm&-usr=admin&-pwd=instar
Before you enter this command into your Smarthome configuration, you can first copy&paste it into the address bar of your web browser and press enter. If you receive an OK from your camera and see the effect you wanted - in the case above you should see an alarm in your camera's System Log and all active Alarm Actions should be triggered - you are good to proceed configuring your Smarthome.
1. Use external Sensors
Triggering an alarm on the camera by an event registered by your home automation system:

/param.cgi?cmd=pushhostalarm&user=USERNAME&pwd=PASSWORD/param.cgi?cmd=pushhostalarm&-usr=USERNAME&-pwd=PASSWORD2. Activate Nightvision only when Motion is detected
Activate your cameras night vision according to a schedule or triggered by an external sensor integrated in home automation system:

/param.cgi?cmd=setinfrared&-infraredstat=0&user=USERNAME&pwd=PASSWORD/param.cgi?cmd=setinfrared&-infraredstat=2&user=USERNAME&pwd=PASSWORD
/param.cgi?cmd=setinfrared&-infraredstat=auto&-usr=USERNAME&-pwd=PASSWORD/param.cgi?cmd=setinfrared&-infraredstat=close&-usr=USERNAME&-pwd=PASSWORD
The activation of the night vision in case of an alarm is of course only possible if the camera has an internal PIR sensor for motion detection, or if you use the alarm signal of an external sensor in home automation to "focus" the camera. The advantage - the camera is inconspicuous at night and the IR light attracts no insects / spiders. And the power consumption is of course also pressed.
3. Schedule different Positions
Scheduled day and night position - guard the front door when I'm not at home but I turn the camera to my carport when I'm back from work:

/param.cgi?cmd=preset&-act=goto&-number=0&user=USERNAME&pwd=PASSWORD/param.cgi?cmd=preset&-act=goto&-number=1&user=USERNAME&pwd=PASSWORD
/param.cgi?cmd=preset&-act=goto&-number=0&-usr=USERNAME&-pwd=PASSWORD/param.cgi?cmd=preset&-act=goto&-number=1&-usr=USERNAME&-pwd=PASSWORD
4. Verwenden Sie für jede Position unterschiedliche Erkennungsbereiche
In Kombination mit der geplanten Tag- und Nachtposition (siehe oben) können Sie auch verschiedene Bewegungserkennungsbereiche aktivieren - im Beispiel sind die Bereiche 1 & 2 tagsüber und die Bereiche 3 & 4 nachts aktiviert:

/param.cgi?cmd=setmdattr&area=1&enable=1&cmd=setmdattr&area=2&enable=1&cmd=setmdattr&area=3&enable=0&cmd=setmdattr&area=4&enable=0&user=USERNAME&pwd=PASSWORD/param.cgi?cmd=setmdattr&area=1&enable=0&cmd=setmdattr&area=2&enable=0&cmd=setmdattr&area=3&enable=1&cmd=setmdattr&area=4&enable=1&user=USERNAME&pwd=PASSWORD
/param.cgi?cmd=setmdattr&-name=1&-enable=1&cmd=setmdattr&-name=2&-enable=1&cmd=setmdattr&-name=3&-enable=0&cmd=setmdattr&-name=4&-enable=0&-usr=USERNAME&-pwd=PASSWORD/param.cgi?cmd=setmdattr&-name=1&-enable=0&cmd=setmdattr&-name=2&-enable=0& cmd=setmdattr&-name=3&-enable=1&cmd=setmdattr&-name=4&-enable=1&-usr=USERNAME&-pwd=PASSWORD
5. Use different Sensitivities for Day & Night
Since there are often different sensitivities needed for the motion detection during day and night conditions, you can also adjust these - in the example to 75% during the day and 25% at night:

/param.cgi?cmd=setmdattr&area=1&s=75&user=USERNAME&pwd=PASSWORD/param.cgi?cmd=setmdattr&area=1&s=25&user=USERNAME&pwd=PASSWORD
/param.cgi?cmd=setmdattr&-name=1&-s=75&-usr=USERNAME&-pwd=PASSWORD/param.cgi?cmd=setmdattr&-name=1&-s=25&-usr=USERNAME&-pwd=PASSWORD
6. Deaktivieren Sie den Alarm aller Kameras, wenn Sie zu Hause ankommen
Nutzen Sie eine Smartbutton oder Funk-Schlüsselanhänger um alle Alarmerkennungsbereiche und den PIR-Sensor aller Kameras zu deaktivieren, wenn Sie keinen Alarm auslösen möchten:

/param.cgi?cmd=setmdattr&area=1&enable=0&cmd=setmdattr&area=2&enable==0&cmd=setmdattr&area=3&enable==0&cmd=setmdattr&area=4&enable=0?cmd=setpirattr&enable=0&user=USERNAME&pwd=PASSWORD/param.cgi?cmd=setmdattr&area=1&enable=1&cmd=setmdattr&area=2&enable=1&cmd=setmdattr&area=3&enable=1&cmd=setmdattr&area=4&enable=1?cmd=setpirattr&enable=1&user=USERNAME&pwd=PASSWORD
/param.cgi?cmd=setmdattr&-name=1&-enable=0&cmd=setmdattr&-name=2&-enable=0&cmd=setmdattr&-name=3&-enable=0&cmd=setmdattr&-name=4&-enable=0?cmd=setpirattr&-pir_enable=0&-usr=USERNAME&-pwd=PASSWORD/param.cgi?cmd=setmdattr&-name=1&-enable=1&cmd=setmdattr&-name=2&-enable=1&cmd=setmdattr&-name=3&-enable=1&cmd=setmdattr&-name=4&-enable=1?cmd=setpirattr&-pir_enable=1&-usr=USERNAME&-pwd=PASSWORD
Please note for the models IN-6014 HD and IN-9020 Full HD, instead of the PIR sensor - setpirattr&-pir_enable=1 - the alarm input must be switched: cmd=setioattr&-io_enable=1. The same applies to cameras where an external PIR sensor is attached to the alarm input.
7. Use external Sensors to turn your Camera when Motion is detected
Let your camera move between positions depending on system variables in home automation system. For example - when the door sensor is tripped, look to the door, when the window sensor is triggered turn towards the window and when the external motion sensor detects a person, turn to the kitchen door:

/param.cgi?cmd=preset&-act=goto&-number=0&user=USERNAME&pwd=PASSWORD/param.cgi?cmd=preset&-act=goto&-number=1&user=USERNAME&pwd=PASSWORD/param.cgi?cmd=preset&-act=goto&-number=2&user=USERNAME&pwd=PASSWORD
/param.cgi?cmd=preset&-act=goto&-number=0&-usr=USERNAME&-pwd=PASSWORD/param.cgi?cmd=preset&-act=goto&-number=1&-usr=USERNAME&-pwd=PASSWORD/param.cgi?cmd=preset&-act=goto&-number=2&-usr=USERNAME&-pwd=PASSWORD
etc.
This can be combined well with the parking position in the camera - the camera then automatically returns to the standard position after x minutes.
8. Verwenden Sie externe Sensoren, um Alarmaufzeichnungen auszulösen
Wenn Sie Ihre Kamera so einstellen, dass sie sich bei Auslösung durch einen externen Sensor auf eine Position ausrichtet, möchten Sie wahrscheinlich eine Alarmaufzeichnung auf der internen SD-Karte starten, um den Eindringling zu einzufangen. Dies kann durch Starten der manuellen Aufzeichnung über Ihr Hausautomationssystem und nach einer Verzögerung nach dem Stoppbefehl erfolgen. Aufgrund der einstellbaren Verzögerung ist die Länge des Alarmvideos frei wählbar (maximal 15min):

/param.cgi?cmd=startrec&time=15&user=USERNAME&pwd=PASSWORD/param.cgi?cmd=stoprec&user=USERNAME&pwd=PASSWORD
/param.cgi?cmd=manualrec&-act=on&-time=60&-usr=USERNAME&-pwd=PASSWORD/param.cgi?cmd=manualrec&-act=off&-usr=USERNAME&-pwd=PASSWORD
9. Interconnect your Cameras
Install your cameras so that they always keep an eye on each other by utilizing the Park Position that always returns your camera to a set position after it was moved. This prevents intruders from tampering with your cameras unseen.
When one camera detect a motion you can have it contact your home automation system using your camera's Alarmserver Function. You smarthome can then send a command to other cameras nearby to turn towards the position where the initial camera detected the intruder and start an alarm recording.

/param.cgi?cmd=preset&-act=goto&-number=1&user=USERNAME&pwd=PASSWORD/param.cgi?cmd=preset&-act=goto&-number=2&user=USERNAME&pwd=PASSWORD/param.cgi?cmd=manualrec&-act=on&-time=60&user=USERNAME&pwd=PASSWORD/param.cgi?/cmd=manualrec&-act=off&user=USERNAME&pwd=PASSWORD
/param.cgi?cmd=preset&-act=goto&-number=1&-usr=USERNAME&-pwd=PASSWORD/param.cgi?cmd=preset&-act=goto&-number=2&-usr=USERNAME&-pwd=PASSWORD/param.cgi?cmd=manualrec&-act=on&-time=60&-usr=USERNAME&-pwd=PASSWORD/param.cgi?/cmd=manualrec&-act=off&-usr=USERNAME&-pwd=PASSWORD
In this example both cameras look at each other - and keep an eye on what is happening behind the other camera. This position is stored as Position 1 (number=0) and set to be the Park Position. When the left camera detects something, the right one turns around towards the potential intruder - stored as Position 2-8 (number=1-7) - and starts a recording. And vice versa...
10. Scan for Noise Sources
For example, when triggering the audio detection on your camera, you probably do not know the location of the source of the noise. Here you can trigger a horizontal (hscan) or vertical (vscan) search scan. This must then be manually stopped again with the desired delay:

/param.cgi?cmd=ptzctrl&-step=0&-act=hscan&user=USERNAME&pwd=PASSWORD/param.cgi?cmd=ptzctrl&-step=0&-act=vscan&user=USERNAME&pwd=PASSWORD/ptzctrl.cgi?-step=&-act=stop&user=USERNAME&pwd=PASSWORD
/param.cgi?cmd=ptzctrl&-step=0&-act=hscan&-usr=USERNAME&-pwd=PASSWORD/param.cgi?cmd=ptzctrl&-step=0&-act=vscan&-usr=USERNAME&-pwd=PASSWORD/ptzctrl.cgi?-step=&-act=stop&-usr=USERNAME&-pwd=PASSWORD
Alternatively you can use the tour function to move between pre-defined positions specified in the WebUI to a maximum of 50 times (except for the model IN-9020 Full HD, which will run the programmed tour until you stop it manually):
/param.cgi?cmd=ptzctrl&-step=0&-act=tour&user=USERNAME&pwd=PASSWORD
/param.cgi?cmd=ptzctrl&-step=0&-act=tour&-usr=USERNAME&-pwd=PASSWORD
11. Manually deactivate all Alarm functions for all your Cameras
If you have activated more than one alarm trigger in your camera - PIR sensor, alarm areas, audio detection, alarm input - you can activate and deactivate them all at once via the alarm schedule without addressing each trigger individually:

/param.cgi?cmd=setscheduleex&-ename=ms&-week0=NNNNNNNNNNNNNNNNNNNNNNNNNNNNNNNNNNNNNNNNNNNNNNNN&-week1=NNNNNNNNNNNNNNNNNNNNNNNNNNNNNNNNNNNNNNNNNNNNNNNN&-week2=NNNNNNNNNNNNNNNNNNNNNNNNNNNNNNNNNNNNNNNNNNNNNNNN&-week3=NNNNNNNNNNNNNNNNNNNNNNNNNNNNNNNNNNNNNNNNNNNNNNNN&-week4=NNNNNNNNNNNNNNNNNNNNNNNNNNNNNNNNNNNNNNNNNNNNNNNN&-week5=NNNNNNNNNNNNNNNNNNNNNNNNNNNNNNNNNNNNNNNNNNNNNNNN&-week6=NNNNNNNNNNNNNNNNNNNNNNNNNNNNNNNNNNNNNNNNNNNNNNNN&user=USERNAME&pwd=PASSWORD/param.cgi?cmd=setscheduleex&-ename=ms&-week0=PPPPPPPPPPPPPPPPPPPPPPPPPPPPPPPPPPPPPPPPPPPPPPPP&-week1=PPPPPPPPPPPPPPPPPPPPPPPPPPPPPPPPPPPPPPPPPPPPPPPP&-week2=PPPPPPPPPPPPPPPPPPPPPPPPPPPPPPPPPPPPPPPPPPPPPPPP&-week3=PPPPPPPPPPPPPPPPPPPPPPPPPPPPPPPPPPPPPPPPPPPPPPPP&-week4=PPPPPPPPPPPPPPPPPPPPPPPPPPPPPPPPPPPPPPPPPPPPPPPP&-week5=PPPPPPPPPPPPPPPPPPPPPPPPPPPPPPPPPPPPPPPPPPPPPPPP&-week6=PPPPPPPPPPPPPPPPPPPPPPPPPPPPPPPPPPPPPPPPPPPPPPPP&user=USERNAME&pwd=PASSWORD
/param.cgi?cmd=setscheduleex&-ename=md&-week0=NNNNNNNNNNNNNNNNNNNNNNNNNNNNNNNNNNNNNNNNNNNNNNNN&-week1=NNNNNNNNNNNNNNNNNNNNNNNNNNNNNNNNNNNNNNNNNNNNNNNN&-week2=NNNNNNNNNNNNNNNNNNNNNNNNNNNNNNNNNNNNNNNNNNNNNNNN&-week3=NNNNNNNNNNNNNNNNNNNNNNNNNNNNNNNNNNNNNNNNNNNNNNNN&-week4=NNNNNNNNNNNNNNNNNNNNNNNNNNNNNNNNNNNNNNNNNNNNNNNN&-week5=NNNNNNNNNNNNNNNNNNNNNNNNNNNNNNNNNNNNNNNNNNNNNNNN&-week6=NNNNNNNNNNNNNNNNNNNNNNNNNNNNNNNNNNNNNNNNNNNNNNNN&-usr=USERNAME&-pwd=PASSWORD/param.cgi?cmd=setscheduleex&-ename=md&-week0=PPPPPPPPPPPPPPPPPPPPPPPPPPPPPPPPPPPPPPPPPPPPPPPP&-week1=PPPPPPPPPPPPPPPPPPPPPPPPPPPPPPPPPPPPPPPPPPPPPPPP&-week2=PPPPPPPPPPPPPPPPPPPPPPPPPPPPPPPPPPPPPPPPPPPPPPPP&-week3=PPPPPPPPPPPPPPPPPPPPPPPPPPPPPPPPPPPPPPPPPPPPPPPP&-week4=PPPPPPPPPPPPPPPPPPPPPPPPPPPPPPPPPPPPPPPPPPPPPPPP&-week5=PPPPPPPPPPPPPPPPPPPPPPPPPPPPPPPPPPPPPPPPPPPPPPPP&-week6=PPPPPPPPPPPPPPPPPPPPPPPPPPPPPPPPPPPPPPPPPPPPPPPP&-usr=USERNAME&-pwd=PASSWORD
In diesem Befehl steht week0 - week6 für Montag bis Sonntag und jedes P ist eine halbe Stunde des Tages, an dem der Alarmplan aktiv ist (48 x 30min = 24h). Ein N entspricht einem Zeitraum von 30 Minuten, in dem er deaktiviert ist. Der Zeitplan aktiviert / deaktiviert alle Alarmaktionen.
Update November 2019 (nur für Full HD Kameramodelle)
Aufgrund einer Änderung in der Web-Benutzeroberfläche wird der Alarmplan nun in einer neuen Variablen namens setbackupschedule gespeichert. Wenn Sie den obigen Befehl mit nur setscheduleex verwenden, wird der aktive Alarmplan geändert, aber diese Änderung ist innerhalb des WebUI nicht sichtbar. Es wird empfohlen, immer beide Variablen zu setzen, um eine De-Synchronisation zu verhindern:
/param.cgi?cmd=setscheduleex&-ename=md&-week0=NNNNNNNNNNNNNNNNNNNNNNNNNNNNNNNNNNNNNNNNNNNNNNNN&-week1=NNNNNNNNNNNNNNNNNNNNNNNNNNNNNNNNNNNNNNNNNNNNNNNN&-week2=NNNNNNNNNNNNNNNNNNNNNNNNNNNNNNNNNNNNNNNNNNNNNNNN&-week3=NNNNNNNNNNNNNNNNNNNNNNNNNNNNNNNNNNNNNNNNNNNNNNNN&-week4=NNNNNNNNNNNNNNNNNNNNNNNNNNNNNNNNNNNNNNNNNNNNNNNN&-week5=NNNNNNNNNNNNNNNNNNNNNNNNNNNNNNNNNNNNNNNNNNNNNNNN&-week6=NNNNNNNNNNNNNNNNNNNNNNNNNNNNNNNNNNNNNNNNNNNNNNNN&cmd=setbackupschedule&-ename=md&-week0=NNNNNNNNNNNNNNNNNNNNNNNNNNNNNNNNNNNNNNNNNNNNNNNN&-week1=NNNNNNNNNNNNNNNNNNNNNNNNNNNNNNNNNNNNNNNNNNNNNNNN&-week2=NNNNNNNNNNNNNNNNNNNNNNNNNNNNNNNNNNNNNNNNNNNNNNNN&-week3=NNNNNNNNNNNNNNNNNNNNNNNNNNNNNNNNNNNNNNNNNNNNNNNN&-week4=NNNNNNNNNNNNNNNNNNNNNNNNNNNNNNNNNNNNNNNNNNNNNNNN&-week5=NNNNNNNNNNNNNNNNNNNNNNNNNNNNNNNNNNNNNNNNNNNNNNNN&-week6=NNNNNNNNNNNNNNNNNNNNNNNNNNNNNNNNNNNNNNNNNNNNNNNN&-usr=USERNAME&pwd=PASSWORD
12. Switch between PIR and Software Motion Detection
Most of our new cameras have both an internal, software-based motion detection and a hardware PIR (passive infrared) heat sensor to detect motion of objects that have a different surface temperature as the ambient. In most cases we recommend that you link both as they have different strengths and weaknesses and the coupling can filter many sources of false alerts.
But there are situation where one of those two ways to detect motion simply fails and does not provide any filtering effect anymore. Examples are:
- The PIR is exposed to direct sunlight through most of the day. Shadows and temperature changes trigger regular false alarms.
- The Motion Detection Areas are constantly triggered at night due to the light from passing cars.
- etc.
We can use our smarthome to automatically deactivate the problematic sensor during times where we know that their accuracy is affected. Since we probably want to use both sensors during times of the day when both work perfectly, we also have to switch the coupling on and off, accordingly.
Link between PIR and Alarm Areas
/param.cgi?cmd=setalarmattr&armed=1&user=USERNAME&pwd=PASSWORD/param.cgi?cmd=setalarmattr&armed=0&user=USERNAME&pwd=PASSWORD
/param.cgi?cmd=setmdalarm&-aname=type&-switch=on&-usr=USERNAME&-pwd=PASSWORD/param.cgi?cmd=setmdalarm&-aname=type&-switch=off&-usr=USERNAME&-pwd=PASSWORD
Alarm Areas Activation / Deactivation
/param.cgi?cmd=setmdattr&area=1&enable=1&cmd=setmdattr&area=2&enable=1&cmd=setmdattr&area=3&enable=1&cmd=setmdattr&area=4&enable=1&user=USERNAME&pwd=PASSWORD/param.cgi?cmd=setmdattr&area=1&enable=0&cmd=setmdattr&area=2&enable=0&cmd=setmdattr&area=3&enable=0&cmd=setmdattr&area=4&enable=0&user=USERNAME&pwd=PASSWORD
/param.cgi?cmd=setmdattr&-name=1&-enable=1&cmd=setmdattr&-name=2&-enable=1&cmd=setmdattr&-name=3&-enable=1&cmd=setmdattr&-name=4&-enable=1&-usr=USERNAME&-pwd=PASSWORD/param.cgi?cmd=setmdattr&-name=1&-enable=0&cmd=setmdattr&-name=2&-enable=0&cmd=setmdattr&-name=3&-enable=0&cmd=setmdattr&-name=4&-enable=0&-usr=USERNAME&-pwd=PASSWORD
PIR Activation / Deactivation
/param.cgi?cmd=setpirattr&-pir_enable=1&user=USERNAME&pwd=PASSWORD/param.cgi?cmd=setpirattr&-pir_enable=0&user=USERNAME&pwd=PASSWORD
/param.cgi?cmd=setpirattr&enable=1&-usr=USERNAME&-pwd=PASSWORD/param.cgi?cmd=setpirattr&enable=0&-usr=USERNAME&-pwd=PASSWORD
In case of the IN-6014 HD or IN-9020/10 Full HD (also camera models with attached external PIR sensors) you have to switch the alarm input instead:
/param.cgi?cmd=setioattr&-io_enable=1&user=USERNAME&pwd=PASSWORD/param.cgi?cmd=setioattr&-io_enable=0&user=USERNAME&pwd=PASSWORD
/param.cgi?cmd=setioattr&-io_enable=1&-usr=USERNAME&-pwd=PASSWORD/param.cgi?cmd=setioattr&-io_enable=0&-usr=USERNAME&-pwd=PASSWORD
Discuss this article on the INSTAR Forum !