II-e-1 Activate WPS

IN-9008 Full HD Quick Installation

Connect the WiFi antenna and make sure that the antenna cable is still connected (see step #3 Here). Now plug in the power supply and wait for the camera to boot. Press the Reset/WPS button for 3s to activate the WPS function (Caution: pressing it for 10s will reset your camera!).

Activate your routers WPS mode at the same time you activated it on your camera. Please refer to your routers user manual about it WPS function.
II-e-2 Router WPS
Start our IP Camera Tool from the Software CD and double click on the name of the camera
II-e-3 Camera Tool
The default administrator login is User/Password: admin / instar. Our Installation Wizard will lead you through the rest of the installation process.
II-e-4 User Login
You need to install the Adobe Flash Plugin to display your cameras h.264 video stream. You can use to HTML5 Stream without the need to install a Browser plugins on your machine.
II-e-5 Video Plugin

II-e-6 Internet Access

IN-9008 Full HD Quick Installation

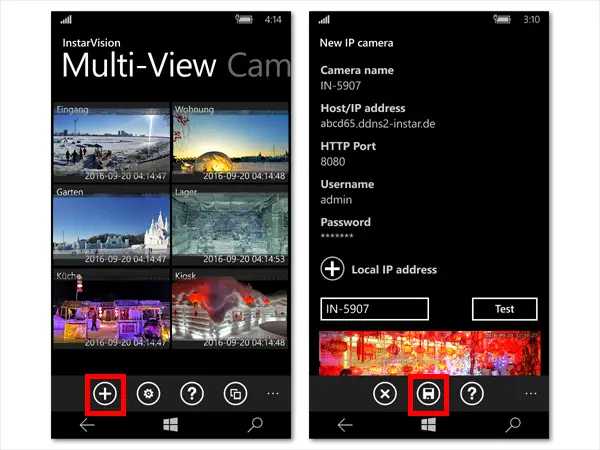
You need to Forward a Port inside your router, if you want to access your camera over it´s DDNS Address from the internet. Alternatively, you can use the P2P User ID to access your camera with our smartphone app (see Step 12 below).

Now you can enter your camera´s DDNS information to our free Windows Phone, Windows Metro, Android, iPhone, iPad or Blackberry App.
II-e-7 DDNS Access
If you cannot open a port for camera´s DDNS service, you can still use the POINT-2-POINT SERVICE instead with our Windows Phone, Windows Metro, Android, iPhone, iPad or Blackberry App.
II-e-8 P2P Access

II-e-9 Reassemble

IN-9008 Full HD Quick Installation

Fasten the mainboard slide and use the 4 screws to mount the back plate back onto your camera casing. Screw the wall mount to the back of the camera.

II-e-10 Final Installation

IN-9008 Full HD Quick Installation

Install your camera and plug in the power supply. The camera should automatically reconnect itself to your WiFi network.