ioBroker Blockly Script Engine
- INSTAR MQTT Broker und ioBroker
- Verwenden Sie ioBroker als MQTT-Broker anstelle eines MQTT-Clients
- Verwenden Sie den INSTAR MQTT Alarmserver mit ioBroker
- Verwenden Sie den INSTAR MQTT Alarmserver, um eine einfache Objektverfolgung zu erstellen
- Aktualisieren, wenn Clients eine Verbindung zu Ihrem Broker herstellen
- Hinzufügen von Kameras, die MQTT nicht unterstützen
- Verwendung des HTTP-Alarmservers anstelle des MQTT-Alarmservers
- Verwenden des Node-RED-Adapters zum Erstellen einer Visualisierung
- Ein intelligenter Weg, die Live-Videos Ihrer Kameras dem ioBroker Vis hinzuzufügen
- INSTAR MQTT und BlueIris in ioBroker
- ioBroker MQTT Adapter und Sonderzeichen
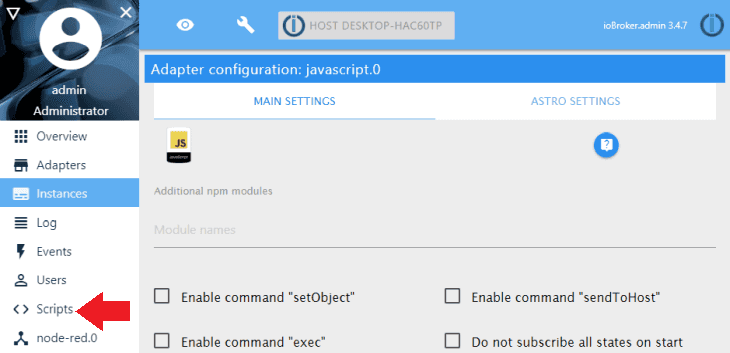
ioBroker comes with a Blockly Adapter that - very similar to Node-RED - allows you to create small scripts with a graphical user interface. You can install it from the Adapters tab:
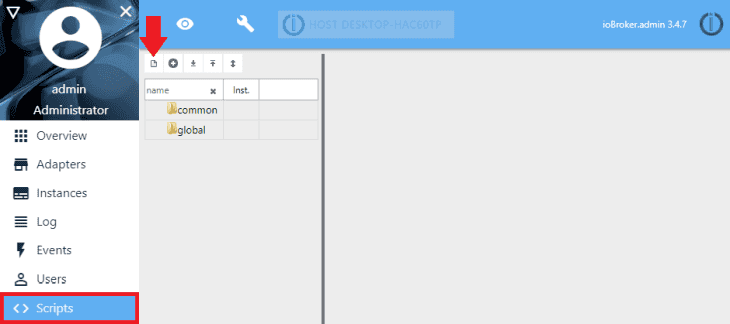
Click on the Scripts tab to load the Blockly interface:
Click on the New Script icon:
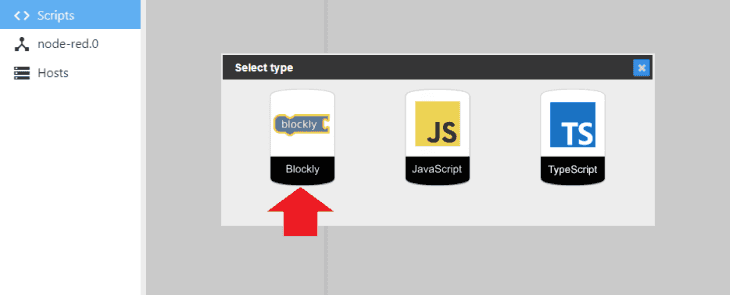
And choose the Blockly Script Engine to load the Blockly interface:
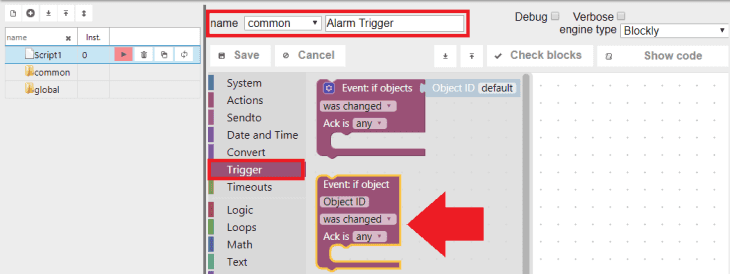
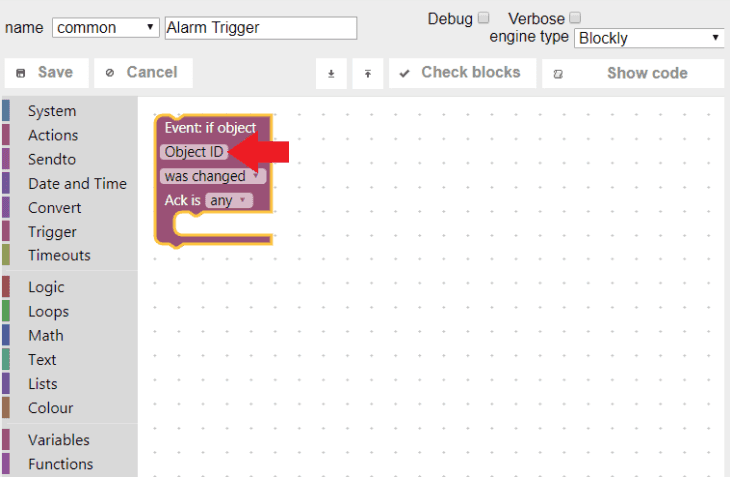
Drag a Trigger - Event: if object block onto the canvas:
Click on the Object ID to assign a trigger to the object:
We are using the MQTT adapter to send messages to our IP camera. And we already learnt that, if a message arrives, we will see it inside the ioBroker Objects tab. For testing we can use the program MQTT.fx to send messages via MQTT, receive them in ioBroker and use them as a trigger in our Blockly script.
We already connected MQTT.fx to our MQTT server and am now publishing a message iobroker/alarmserver/triggered. Once we click Publish we see the corresponding entry in the ioBroker Objects List:
Going back to our Blockly script, clicking on the Object for the Trigger block will open the lists of objects registered with ioBroker - we can find the message we just send under mqtt.0/iobroker/alarmserver/triggered. Select triggered for our trigger object:
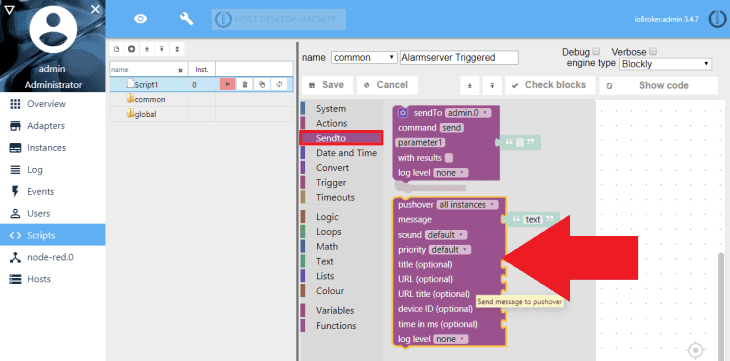
Now add another block to our script - in this case a Sendto block for the Pushover Adapter:
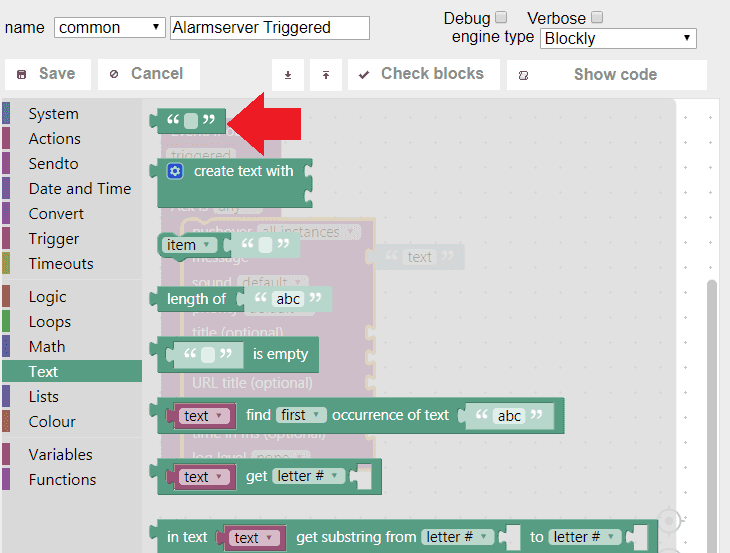
Add Text Blocks:
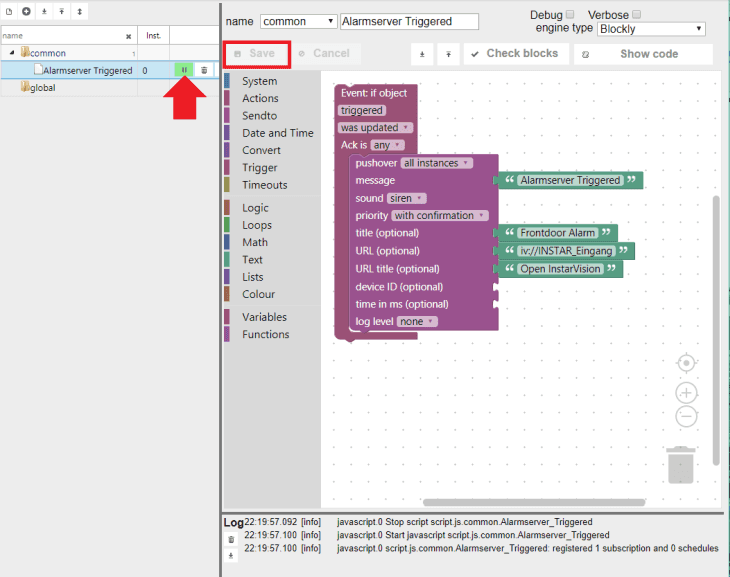
Connect them to the Pushover Block wherever appropriate and add some text to the push notification. Note a little trick we use here:
Nehmen wir an, Sie verwenden Ihr Blockly-Skript, um jedes Mal, wenn der Alarm einer Kamera ausgelöst wird, eine Push-Benachrichtigung zu senden. Sie können der Nachricht eine URL hinzufügen, die die besagte Kamera direkt in unserer Android-App InstarVision öffnet! Geben Sie einfach iv://Name der Kamera in das URL-Feld ein. Als Namen der Kamera müssen Sie den Namen wählen, den Sie ihr innerhalb der InstarVision App gegeben haben (stellen Sie sicher, dass der Name keine Leerzeichen oder Sonderzeichen enthält).
Wenn die Benachrichtigung eintrifft, verwenden Sie diesen Link, um die Live-Ansicht der Kamera direkt in der Android-App zu öffnen (Die App muss im Hintergrund laufen, sonst wird das Multiview-Fenster angezeigt).
Save the script and make sure that it is running.
Go back to MQTT.fx and resend the message:
The push notification will be triggered and arrive at your smartphone seconds afterwards:

